Brake lights (or taillights) are one of the most important components of an automobile. They use a switch that turns the bulbs on the moment you press the brake pedal.
Brake lights warn other vehicles behind you when you are about to slow down or stop. But when stuck, these lights defeat their purpose as a safety feature and potentially put you and others in danger.
Among the most common reasons your brake lights stay on are circuit errors, brake assembly problems, or a low brake fluid level. While some issues are simple to assess and fix, others occur due to unkempt car parts.
Here are common ways to fix brake lights that stay on:
- Check the brake light switch for damage
- Replace blown fuses
- Install a new brake light switch
- Keep your brake pedal bumper functional
- Replace burnt-out bulbs
- Detach the car battery
- Keep your brake pedal dirt-free
- Ensure the brake pedal pushes the switch correctly
- Make sure to have clean brake sockets
- Do not short your BCM
- Have sufficient brake fluid
- Disengage your parking brake
This article lists the most common fixes to stuck brake lights. It also covers how to replace your brake light switch and bumper, should there be a need.
This article aims to keep vehicle owners informed of how they can maintain the proper function of their car’s safety features – so stick around to learn more.
Brake Lights Stay On: How to Fix

1. Check the Brake Light Switch for Damage
Before doing any work on your vehicle’s electrical system, always disconnect the battery to avoid shock or damage.
To do this, slip the cable off and tuck it to the side of the battery. Then locate the negative terminal and disconnect it. A hand or socket wrench can loosen the nut securing the ground cable to the battery terminal.
Putting on eye protection is highly recommended as you go about locating your brake pedal switch, disconnecting the wiring pigtail, and inspecting it for damage. Do not forget to test the return of the switch to ensure it is properly working.
2. Replace Blown Fuses
Use your owner’s manual as a guide in determining which of the fuse box – the one under the hood or the other one on the driver’s side of the cabin – contains the blown fuse that needs replacement.
Depending on your vehicle’s make and model, you may need to remove pieces of the interior trim to access the fuse box, and you may need to inspect more than one fuse for your brake light. If you don’t have an available service manual, revert to the manufacturer’s website for diagrams and steps.
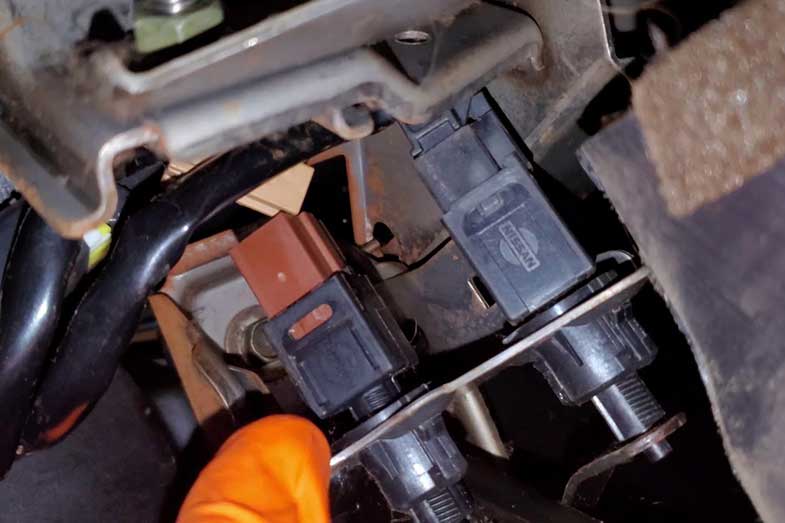
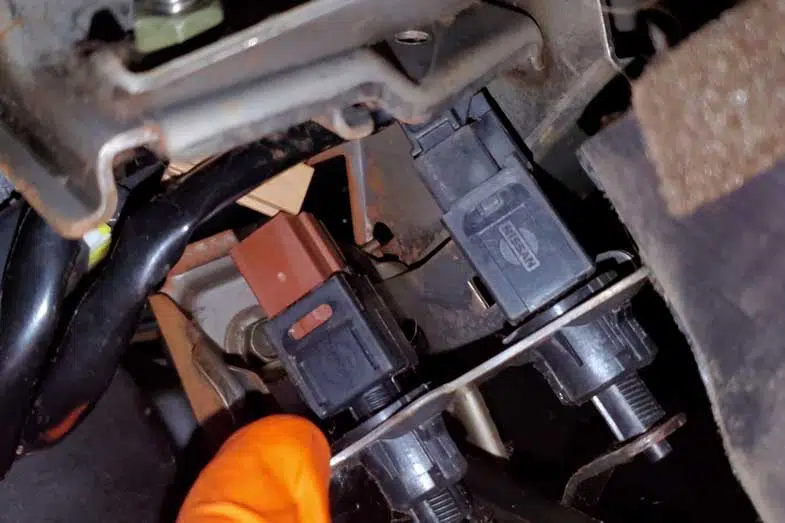
3. Install a New Brake Light Switch
The brake light switch is a two-way mechanism near the brake pedal and is often marked. This completes the brake light’s circuit in your vehicle’s electrical system and needs to be replaced if found defective.
Ensure the pigtail harness is disconnected and tucked away somewhere safe before removing the brake light switch, as you will be reusing that same harness later. You also need to remove the brake switch from the brake pedal linkage.
Don’t lose the mounting hardware, as you will need to reuse it when installing the new switch. If you break the harness release by accident, you can use electric tape to hold the pigtail in place during reassembly.
4. Keep Your Brake Pedal Bumper Functional
A deteriorated brake pedal bumper on top of the pedal assembly will activate your brake light switch. A missing bumper will do the same.
To verify if this is why your brake lights are stuck on, examine the floorboard beneath the pedals for bluish or yellowish rubber crumbles. Spotting these crumbs points to a deteriorated bumper due to heat and age, confirming it as the cause of the problem.
Replace missing bumpers with new ones as soon as you can so that you can close out the brake circuit.
5. Replace Burnt-Out Bulbs
Among the most common causes of brake light problems is a burnt-out bulb. The number of times you pump your brake while driving and wear and tear can take a toll on your brake lights.
Two outcomes will occur when this happens – either the brake lights are stuck on or not working. Should you encounter something similar and you own an older-model vehicle, expect to replace your brake light bulbs a bit more often, as these cars still have traditional bulbs compared to more recent transports that have LED lights.
Conversely, determine if your turn signals need replacement – this applies to American vehicle owners with blinkers incorporated into the brake light circuit.
6. Detach the Car Battery
If your vehicle’s brake light gets stuck or is not working, it will start to drain your battery. A temporary fix for this is to detach your battery while your vehicle is off when you encounter this issue.
Not only does this temporarily stop the brake light from being stuck, but it also helps you save battery power to be able to start the car until the issue rectifies.
Make sure that your hood latch is not electric before you disconnect the negative battery terminal. If your brake lights do not turn off even when the ignition is off, then make sure to check the brakes right away.
7. Keep Your Brake Pedal Dirt-Free
A brake pedal that is stuck or not closing the switch is another cause for the brake light to stay on or get stuck. It may be due to a defective rubber stopper or debris/corrosion between the brake switch and pedal.
To prevent this from happening, keep your brake pedal clean and corrosion-free. However, if your cleaning does not fix the problem, then perhaps professional servicing and upkeep will.
8. Ensure the Brake Pedal Pushes the Switch Correctly
In some cases, a stuck brake light is caused not by an electrical fault. Sometimes, the brake pedal or switch is not aligned correctly, resulting in the brake light getting stuck.
An easy-to-follow remedy is to look under the dash above the brake pedal and follow the pedal arm up to the switch. The expectation is that the stoplight switch is aligned with the arm and pushed to shut the brake lights off.
If you see otherwise, adjust the brake switch so that it gets to open the connection. If no luck, then you may be dealing with a non-working spring, a faulty switch, or a short in the brake circuit wiring.
9. Make Sure to Have Clean Brake Sockets
Corroded or dirty connections and worn wiring can make your socket go amiss, which results in brake lights stuck on and intermittent connection. Clean out those sockets to prevent your brake lights from getting stuck.
If it is no longer feasible to clean the brake light sockets, replace them by snipping the old wires and splicing in the new unit. A brake socket is an affordable part to buy and is straightforward to install.
10. Do Not Short Your BCM
The BCM or Body Control Module connects to the wiring circuit (brake light switch) and onto the rear brake lamps for newer vehicles. The switch uses a ground trigger for the BCM, which turns the brake lights’ power on.
If there is something wrong with the BCM, this could leave the brake lights stuck on. Older cars do not use a BCM, though, as the switch directly connects power to the brake lights.
11. Have Sufficient Brake Fluid
Low levels of brake fluid affect your vehicle’s braking performance and brake light function. Hence, keep your brake fluid within ample levels so that your brake lights do not act up.
To check on this, locate the master cylinder or the brake fluid reservoir on the driver’s side of the cabin. The fluid level should be within maximum and minimum indicators. If not, flush out the old brake fluid before adding a new one to the reservoir.
12. Disengage Your Parking Brake
Although this rarely happens, the cause of your problem may be as simple as an engaged parking brake. Fully releasing the parking brake will get your brake light unstuck.
Now that you are aware of the possible causes why your brake light gets stuck on, it will be easier to narrow down its origin and troubleshoot accordingly.
Tools for the Job
Having the proper tools will make brake light wiring jobs less difficult. Below are the things you will need:
- A test light, multi-meter, or volt ohm meter, like a Fluke 116/323 HVAC Multimeter and Clamp Meter Combo Kit (view on Amazon)
- Right-size replacement bulbs
- A set of wire disconnectors
- Different-size wrenches, included in a 204-Piece DEWALT Mechanics Tools Kit and Socket Set (view on Amazon)
- Brake light sockets
- Wire stripper
- Electrical tape
- Dielectric grease
- A diagnostic scan tool, like a LAUNCH X431 PROS Mini Bidirectional Scan Tool (view on Amazon)
- Soldering iron
How to Test a Brake Light Switch
Below are steps on how to determine whether a faulty brake light switch is what is causing your brake lights to stay on:
1. Locate the Brake Light Switch
Find the brake light switch under the dashboard near the top of the brake pedal. This switch is typically attached to the pedal’s arm via a bracket with two wires attached to it.
2. Test the Wires
The next thing you will need to look at is the wires attached to the switch. Verify that they securely connect.
A loose wire will not make the brake lights work. Similarly, a stuck wire will keep the lights on.
Test the wires by touching the tester’s positive lead, with the other lead touching bare metal. You will know that you have located the feed wire for the brake switch if the test light illuminates or your voltmeter reads 12V.
Only one of the two wires attached to the brake light switch should render this result.
3. Inspect the Switch’s Alignment
Once done with the wires, inspect the switch’s alignment and confirm that a depressed brake pedal activates the switch’s plunger. Make sure that the brake pedal does not stay abnormally locked in place either.
Without taking the leads from their place, depress the brake pedal. When you do this, the test light should illuminate, and the voltmeter should read 12V (if nothing is wrong with the brake switch). Otherwise, you may need to replace your defective switch.
Lights not illuminating or returning a 12V reading would mean that the brake switch is not receiving power, signifying a wiring problem.
Replacing a Brake Light Switch
A successful brake light switch test may direct you to replace a defective brake light switch. To do this, you will need to:
- Unplug the brake light or stoplight switch.
- Loosen and remove the bolts holding the switch in place (could be as many as 1-4 bolts depending on vehicle).
- Loosen the adjustment nut from the mounting plate with a wrench.
- Unscrew the threaded brake light switch by hand.
- Disconnect the wiring harness by pressing the locking tab and pulling the harness away from the brake light switch.
- Remove the defective switch and screw in a new one.
- Plug the wiring harness into the new stoplight switch until the locking tab clicks into place.
- Tighten the adjustment nut and bolts with a ratchet and socket.
- Check for proper brake light operation by pressing and releasing the brake pedal several times.
Replacing a Brake Pedal Switch Bumper
Another brake assembly part that is commonly found at fault is the brake pedal switch bumper. Here are steps on how to replace it:
- First, you need to create a vacuum in the braking system – you can achieve this with your vehicle running.
- Press the brake pedal with one hand.
- Slide the brake light switch bumper up the brake pedal with your other hand, feeling around for the hole where it should go. Verify that the flat portion of the switch bumper is facing the rear of the vehicle.
- Clean out any debris left behind by the old switch stopper in the hole where the bumper goes into.
- The flanged part of the switch bumper should be pushed hard into the hole so that it snaps into place. Using a universal bumper, clipping a little rubber off of the flange can help it fit.
- Shine a flashlight on the switch stopper and check that it sits flush against the metal plate.
- Once the bumper is in place, release the brake, and the plunger should press against the replacement part.
- Press and release the brake pedal and test if the brake lights are turning off and on.
Conclusion – Brake Lights Stay On
In summary, here are 12 ways on how to fix stuck brake lights:
- Check the brake light switch for damage
- Replace blown fuses
- Install a new brake light switch
- Keep your brake pedal bumper functional
- Replace burnt-out bulbs
- Detach the car battery
- Keep your brake pedal dirt-free
- Ensure the brake pedal pushes the switch correctly
- Make sure to have clean brake sockets
- Do not short your BCM
- Have sufficient brake fluid
- Disengage your parking brake
The next time anyone asks you, “Why are my brake lights stuck on?” you should be able to assist them with where and what to inspect.
Not only will this knowledge save you hundreds of dollars for professional servicing, but also keep you from incurring huge fines or being cited for not having brake lights that properly function. Most importantly, you keep yourself from driving under risky conditions, reducing your chances of causing an accident or being in one.
Kris is an avid off-roader and outdoor enthusiast who loves to brave the elements and take on challenging terrain. He also enjoys sharing his passion and knowledge with others so that they, too, can appreciate the ride.
About Kris