Ignition-Off Draw (IOD) is a normal circumstance where power drains from a car’s battery while the ignition switch is off. Vehicles that have not operated for 20 days or more will experience heavy battery drainage. Before storing a vehicle, remove the IOD fuse to reduce discharge. But where is the IOD fuse located?
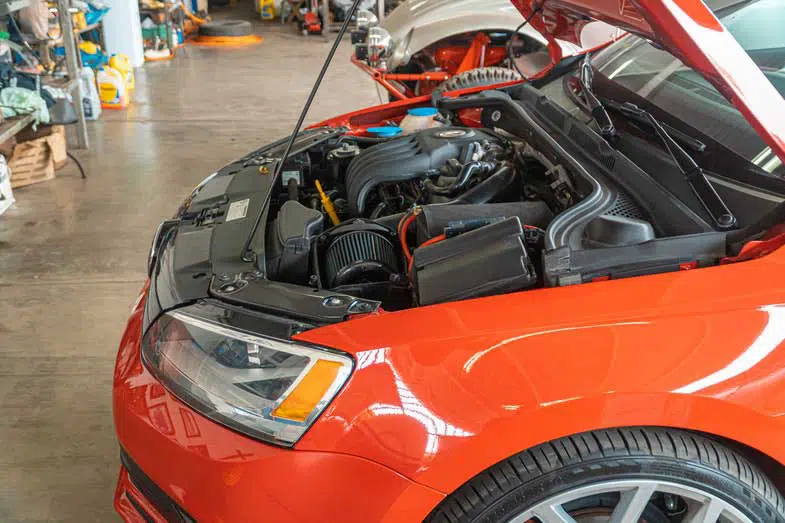
The Ignition-Off Draw (IOD) fuse is located in the Total Integrated Power Module (TIPM), usually found near the battery in the engine compartment. Depending on your vehicle model, it may elsewhere, such as below the steering wheel or dashboard.
This article provides a complete guide on the IOD fuse, including its location in different vehicle types. It also covers its functions, how to remove and replace it, and tests you can perform.


What Is the IOD Fuse?
The IOD fuse is a device used to prevent battery discharge while the vehicle is not in use. It’s beneficial when shipping or for long-term storage. The IOD fuse provides overcurrent protection of electrical circuits that goes through it. A protective clip encases the fuse, which a vehicle owner can pull up to break the circuit. It is a sacrificial device as it melts or gets burnt when too much current flows through it.
The IOD fuse may disconnect from the TIPM to reduce the normal drainage of a vehicle’s battery depletion. Disconnection is most common during transportation and pre-delivery storage. Dealer personnel must reconnect the IOD fuse once the car is ready for delivery to restore its full electrical system operation. It is important to note that disconnecting the IOD fuse will not eliminate IOD, but only reduce or slow it down. Should an owner disconnect the battery’s negative cable to stop normal IOD, the battery should still be tested and recharged at regular intervals to prevent it from becoming damaged.
Where Is the IOD Fuse Located?
The IOD fuse location varies depending on the make and model of the vehicle. The list below is not exhaustive but should give you a good idea of where to look for the IOD fuse depending on the car you own:
| Vehicle | TIPM / IOD Fuse Location |
| Chevrolet Colorado ZR2 | engine compartment (on the driver’s side) |
| Chrysler PT Cruiser (2001-2010) | engine compartment near the air cleaner assembly – a description of each fuse and component may be stamped on the inside of the cover |
| Dodge Grand Caravan (2005) | left side of the fuse box under the hood, near the battery |
| Dodge Grand Caravan (2008) | engine compartment near the battery. (view the fuse diagram for model years 2008 to 2010 by clicking here) |
| Dodge Ram (2007) | fuse panel below the dashboard on the driver’s side near the steering column (specifically in the cab, in position #17 in the fuse box) |
| Dodge Ram (2012) | engine compartment near the battery |
| Ford Bronco | engine compartment |
| Ford F-150 Raptor | under the right-hand side of the instrument panel behind the cover (passenger compartment) |
| Ford Ranger Raptor | driver side of the dash under the steering wheel |
| Isuzu D-Max | in the cabin, at the right side of your dashboard (when you open the driver’s door you can see the fuse cover with a slot in it) |
| Isuzu VehiCROSS | on the left side of the instrument panel, or in the engine compartment on the right side |
| Jeep Cherokee | found in the PDC (Power Distribution Center) under the hood, or on the passenger side on the corner of the dash (for a 2020 Limited edition) |
| Jeep Grand Cherokee | under the instrument panel just to the left of the steering column (behind the cover) or in the engine compartment (for a 2014 model) |
| Jeep Grand Cherokee Trailhawk | passenger’s side of the car, on the right side and below the dashboard |
| Jeep Wrangler / Gladiator / Liberty | engine compartment near the battery (big white dual-fuse holder J13) |
| Land Rover Defender | one fuse box is located under the RH front seat, and the other is located below the steering wheel |
| Mercedez-Benz G 550 4×4 | driver side of the instrument panel, behind the cover; enclosed in a black or clear holder in the fuse block in the trunk (for E-class 4×4) |
| Mitsubishi Pajero | driver side of the instrument panel, behind the cover |
| Nissan Patrol | on the left under the steering wheel, behind the cover |
| Nissan Titan XD Pro-4X | glove box |
| Ram 1500 Rebel | on the left under the steering wheel, behind the cover |
| Subaru Outback | behind the cover to the left of the steering wheel |
| Suzuki Jimny | under the instrument panel (on the driver’s side) |
| Toyota 4Runner TRD Pro | under the instrument panel (on the left side), under the cover |
Indications of a Bad IOD Fuse
When the IOD fuse blows, it usually produces problematic symptoms and alerts the driver of a potential issue.
Systems Affected by a Blown Fuse:
- Interior dome/reading/map lights
- Power locks
- Open-and-close door module & window motors
- Radio/CD/Cassette player (the unit may still show trim lighting)
- The trip odometer memory (would reset each time the car is shut down)
- Left/Right visor vanity and underhood lamps
- DLC connector
- Electric or memory seats
- GPS equipment
- Wireless control module or WCM
- Clock
- Remote key receiver
- Remote engine start module
- Heater fan on warm engine detect
- CCN wake-up with ignition off & Homelink (for PT Cruiser models)
- Security system & alert (security light stays on the dash despite your vehicle not turning over)
Blown IOD Fuse Symptoms:
- Parasitic battery drain
- No fuse error message
- Dash cluster blinking wildly
- Engine won’t crank
- Radio, dome lights, and cargo lights quite working
- Windows wouldn’t go down
- Horn sounding when the doors are locked
These symptoms would usually hint of a blown IOD fuse. But to be sure, do the following steps:
- Buy a fuse tester/puller at a local auto parts store to individually pull the fuses related to your car functions. They include those in the fuse box by the driver’s left knee inside the car and a 40-amp fuse up in the PDC under the hood. If all these check out okay, then it would be an indicator that your IOD fuse is the culprit.
- Disconnect the negative cable from the battery. Take one end of the multimeter, put it on the negative post, and then put the other on the negative cable terminal. Then pull the fuses one by one. Pulling the faulty fuse would give a reading of 0 amp or show a sudden drop in amperage reading.
- Rule out defective components by doing the following:
- A load test and a diode test – to see if both your battery and alternator are good.
- Clean all of the grounds, including any of the electrical connections and terminals.
- Replace the positive and negative battery terminals with something slightly heavier duty.
- Replace the Key FOB batteries with a good quality name brand.
Further Tips:
Take note of known problematic cars like Dodge Grand Caravans and 1st generation Jeeps with the old wireless control module spike issue. For Jeeps, the battery drain happens when the security system goes through a panic attack, or if the (WCM) metal key blade gets static electricity buildup and fails to read the transponder. A 2008 TSB instructed Jeep owners to do an IOD fuse disconnect for 10 seconds. If this step failed, the technician was to replace the WCM. These vehicles may show symptoms similar to a blown IOD fuse, so it is best to eliminate all other possible reasons before concluding that the IOD is the cause.
Ignition-Off Draw Tests
For vehicles with or without electronic automatic transmission, load-leveling suspension, or alarm systems, test for higher amperage IOD to prevent damage to most milliamp meters. Use a standard 12-volt test light and a milliamp meter equipped with two leads that can handle up to 2 amps. Once you have the equipment you need, perform the following:
- Verify that all electrical accessories are off. Allow these to time out in approximately 30 seconds.
- Remove the engine compartment lamp bulb after verifying that it is working by opening and closing the hood.
- Detach the negative battery cable and connect the 12-volt test light between the negative cable clamp and the negative battery post.
- For vehicles with alarm systems, cycle the key lock on the driver’s door to disarm the alarm. This will stop the parking lights from flashing.
- Expect the test light to be brightly lit for up to three minutes or not lit at all, depending on your vehicle’s model and electronic components.
- If the test light remains brightly lit after three minutes, do not disconnect. Instead, disconnect each fuse or circuit breaker until your test light is dimly lit or off to eliminate higher amperage IOD. Once done, it will be safe to install the milliamp meter to check for low amperage IOD.
- Disconnect the alternator’s wiring harness if your test light is still brightly lit after disconnecting each fuse and circuit breaker. Remember not to disconnect the test light.
- Check for low amperage IOD by connecting the milliamp meter between battery negative post and negative battery cable. Avoid opening the doors or turning on any electrical accessories while you do this as your milliamp meter may damage.
- Disconnect the test light and see if the milliamp meter reading is less than 30 milliamperes. If not within specifications, disconnect the 60-way connector, the 25-way connector, the circuits to the clock and radio, and the alternator’s wiring harness.
- Check each component until there is excessive IOD. Take note that the test light or meter must remain connected for all tests.
Regardless of the result of both high and low amperage IOD tests, note the following:
- Locate the Power Distribution Center and remove the 50-amp fuse.
- Allow your vehicle an additional 25 minutes minimum of electronic shut off time if it is equipped with electronic automatic transmission and where you suspect high or low IOD.
- If your vehicle has an automated load-leveling system and you suspect high or low IOD, allow an additional 65 minutes minimum of electronic shut off time.
How to Remove the IOD Fuse
Getting the IOD fuse out of its clip can be a bit tricky. Start by removing the housing top to the air filter. To do this, disengage the clips on the left and the right front sides and the screw that holds the retaining ring. Using a tiny, thin, or curved-tip screwdriver, pry the tabs on the left side of the opening (the plastic hinges on the right) to allow access to the fuse.
Pull the fuse with small pliers and make sure not to get the low-profile fuses. Replace a new IOD fuse in the casing, put the small plastic carrier back on, and close the top of the clip. Reinsert the IOD into the fuse box by pushing the larger plastic casing back into its original position symmetrically (if not done correctly, you will feel two detents as each side of the fuse holder snaps past the pre-hold position). Then, check that all accessories and functions are back in working condition. And voila! You have successfully replaced your blown IOD fuse.

Conclusion – Where Is the IOD Fuse Located?
The IOD fuse is located in the vehicle’s engine compartment. It could be on either side of the dashboard or instrument panel, under the hood, or below the steering wheel. Refer to your vehicle’s fuse box diagram or this guide when locating or replacing the IOD fuse.
Kris is an avid off-roader and outdoor enthusiast who loves to brave the elements and take on challenging terrain. He also enjoys sharing his passion and knowledge with others so that they, too, can appreciate the ride.
About Kris