Pre- and post-care for off-roading vehicles can be deemed tedious and unnecessary, and there are two sides to this story. Some off-roaders observe them stringently that they forget they are doing them. Meanwhile, others are just plain unlucky and experience a myriad of problems in every outdoor adventure. Whichever the case, one fact remains — off-roading maintenance is indispensable to the performance and longevity of your ride.
Off-road maintenance includes prepping your vehicle with system checks, bracing for on-road mishaps, tidying up, and inspecting relevant components. Nuances in pre- and post-ride upkeep vary, depending on the type of vehicle and severity of the off-roading activity.
We will highlight universally observed practices and tips from seasoned off-roaders. Detailed discussions of upkeep guidelines — and what makes them important — will also be covered. So whether you are prepping for a weekend exploration or just finished one, I am confident you’ll make the most of today’s article.

Off-Road Care Guidelines
Barring mechanical or electrical problems and severe damage to the vehicle’s frame and systems, here are before and after maintenance tips for the off-roading enthusiast:
Pre-Care
1. Load up on fuel.
Every vehicle owner would agree that this is fundamental and applies to activities outside off-roading. You simply fill up your fuel tank before your trip, then replenish before hitting the trail. Doing so reduces the risk of running out of gas or diesel and getting stuck in the wilderness while off-roading.
A rule of thumb for most off-roaders is to use one-third of a tank to reach your destination and save the remaining two-thirds. But if your off-roading expedition requires full-tank capacity, double up on bringing spare fuel (make sure spare containers are outside the vehicle to avoid toxic fumes and the dangers of explosion). Either that or opt for a shorter route (if possible).
2. Fully charge the battery.
I cannot stress this enough — a fully charged battery is crucial to a successful off-roading adventure. Why, you ask? Well, it’s because of the reasons stated below:
- It ensures your rig’s electrical systems have sufficient power to start the engine and run all necessary accessories.
- It can be a reliable power source, especially during unexpected emergencies.
- A fully charged battery prevents potential problems with the engine management system, which may lead to stalling and reduced performance.
- It relieves the alternator of unnecessary strain that usually results in premature failure and costly repairs.
The bullet points above may be non-exhaustive, but they are more than enough justification to fully charge your battery before hitting the trails. In addition, they are a perfect reminder to give your battery some deserved TLC to ensure it does not develop a parasitic draw.
Connecting a battery maintainer allows the battery to cycle and stay charged when not in use. A maintenance-free battery, on the other hand, is kept in tip-top shape by cleaning its terminals, spraying protective solution, and refilling fluids as needed.
Alternatively, inserting a pigtail or connecting the battery to a trickle charger like NOCO GENIUSPRO25 Portable Automotive Charger (view on Amazon) keeps it from fully discharging.
3. Double-check filters and fluids.
Off-roading exposes your four-wheeler more to bumps, vibrations, and jolts that cause fluids to slosh around and potentially leak. Fluids also evaporate or become contaminated more easily when driving in extreme temperatures and riding conditions. Air filters likewise reduce the power mill’s air intake when filthy or clogged, resulting in reduced fuel efficiency and potential engine damage.
These propensities make checking your fluids and filters a fundamental part of your off-roading checklist. That said, check your filters and fluids — coolant, oil, windshield washer fluid, power steering fluid, brake fluid, ATF, and differentials included. Ensure everything is at the proper level with no leaks, and carry extra fluids just in case.
As for the air filter and air filter box, visually check them for debris and swap them out if they are too far gone to clean. Otherwise, you may use an air compressor, filter cleaning kit, water, or soap to decontaminate, depending on the type of air filter you have.
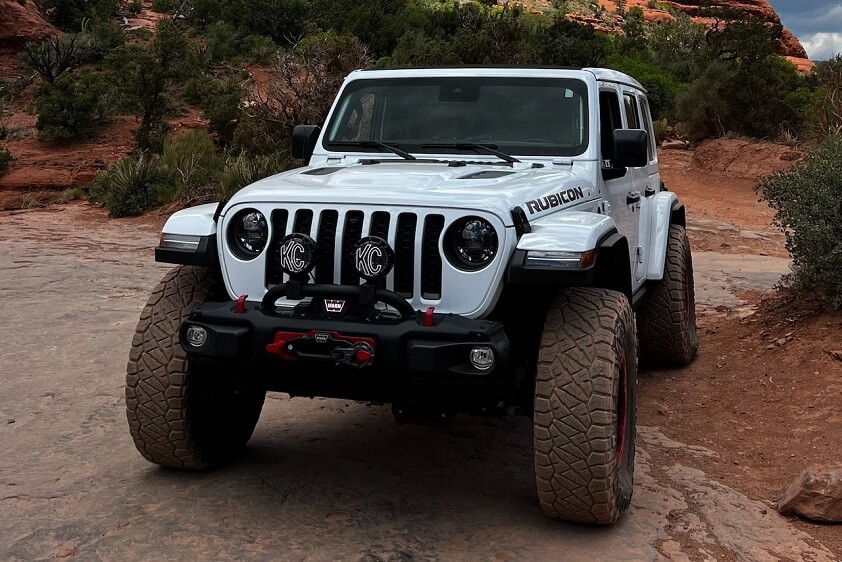
4. Inspect and maintain tires.
Before going off-roading, make sure your tires are properly aligned and inflated. Low tire pressure can cause damage to your tires and make it more difficult to navigate rough terrain. In like manner, misalignment can adversely impact fuel economy, traction, and tread integrity.
Note your tread depth and consider the terrain you will be traversing. If you find no issues, air those tires to spec. Otherwise, bring your 4×4 to a local auto shop for a much-needed realignment.
5. Check for looseness and damage.
In addition to verifying the vehicle is damage-free, see that no loose parts could get caught on rocks or other obstacles. This entails examining your undercarriage — ball joints, tie rod ends, and wheel bearings included.
Check for excessive play in your tire-and-wheel assembly by jacking up, securing your front (or rear) end, and rocking the wheel in and out. Do the same by rocking the tires side-to-side.
6. Examine suspension, brakes, and steering.
If steps #1—5 check out, inspect these systems next. You need all three fully operational and working seamlessly, as they can affect vehicle performance and safety. Moreover, they are bound to be under significant stress during your journey.
A thorough visual inspection applies to all of these segments. Signs of unusual wear and tear, leaks, and damage are typically visible. However, the suspension necessitates checking on proper alignment.
The same goes for brakes — the best testing method is applying it in different conditions and speeds and seeing if it reacts accordingly.
The approach to inspecting these systems may differ depending on the type of off-road vehicle you have. For instance, a high-clearance rig with larger tires would require additional checks for potential clearance issues. Conversely, a smaller vehicle may need a closer look at its suspension due to its lower center of gravity.
7. Protect the lighting assembly and exterior.
To keep your rig safe and functional, it is essential to install accessories like brush guards, skid plates, and rock sliders to protect against potential obstacles on the trail. Safeguarding the exterior with these add-ons (on top of applying a protective coating or film to your wheeler’s paint) is crucial, as scratches and dents could compromise its performance if left unaddressed.
As for lighting, getting high-quality and waterproof equipment is a must-have to ensure visibility in harsh terrain and weather conditions. To add, it is equally important to invest in protective covers — lest you risk replacing flawed lights and markers more frequently than intended. You can invest in protective covers that shield your fog lights and LED bars from rocks, branches, and debris.
8. Brace for unforeseen mishaps on the road.
Yes, bringing an emergency/survival kit and a repair/tool kit is essential to off-roading pre-care. These kits can help you handle unexpected situations like getting lost, being stranded, or facing a breakdown. What goes inside your kit heavily relies on the state of your rig and the kind of off-roading activity you have planned. Nonetheless, here are some staples that should be included:
Emergency/Survival Kit:
- First Aid Kit
- Water and Food
- Blankets
- Flashlights and Batteries
- Matches or Lighters
- Radio or communication device
- Maps and Compass
- Flares
Repair/Tool Kit:
- Spare tire, tire chains (for cold-weather wheeling), and tire repair kit
- Portable air compressor
- Tools (wrenches, pliers, screwdrivers, etc.)
- Jumper cables
- Duct tape
- Spare fluids
- Replacement for the alternator, water pump, or serpentine belts and radiator hoses
- Winch and recovery gear
- High-Lift jack and blocks of wood (10″ x12″, 2″ x4″, 4″ x4″) for support on uneven ground
- Replacement bulbs for lights and markers
In addition to these kits, anticipate comms or navigation problems (hey, it happens to the best of us!). You can pack a fully-charged mobile phone, have spare batteries in a zip lock bag, and bring a car adapter or a 120-volt charger (along with a power inverter) for your GPS unit and other electronics. Handheld FRS walkie-talkies have a great range and are very handy (not to mention inexpensive).
TIP: For days-long expeditions, it is wise to write down crucial medical information to keep in your wallet. This simple practice has spelled the difference between life and death for many off-roading enthusiasts.
Also, tell someone your itinerary — destination, schedule, and all — before your off-roading trip.
If you want to keep your emergency/repair kits concise, carrying extra water, comms, or navigation backup, a knife, recovery equipment, and a source of fire is a good rule of thumb.
9. Test your 4×4 system.
Although talked about infrequently, checking your 4WD system before departing (ideally, a few days before your adventure) makes perfect sense and should be observed more. There are way too many instances where seasoned enthusiasts or one of their peers are caught in a sticky situation — only to realize that they cannot get out of the predicament because their front tires are not spinning.
Remember that as soon as you are out in the wild, your enjoyment (and everything else) will hinge on the ability of your 4WD system to engage and disengage when needed — so make sure not to skip testing your driveline modes and differential lockers before heading out.
10. Gear up for the ride… and the weather.
As an off-roader, preempting any weather condition is crucial for a safe and enjoyable adventure. Naturally, this is only possible if you keep an eye on the forecast for your destination and the route along the way.
Being prepared with the appropriate clothing, protective gear, and other shenanigans (rain jacket, hats, sunglasses, lip balm, sunscreen, etc.) while ascertaining they are rated to climatic and riding conditions also helps.
For folks who love mudding or deep-water fording, pack extra clothing in case you get wet or ambient temperatures become unexpectedly colder.
It is also a good idea to bring a sleeping bag if the need to stay the night arises. Ensure you account for the added weight within your rig’s maximum payload.
Aftercare
1. Hose down your vehicle.
Give your four-wheeler a proper bath when you get home after a long day on the trails. It is important to wash any dirt, mud, and debris that could damage or corrode your rig — especially if you are into mudding or ripping through the dunes.
While doing so, be especially mindful of brake pads, suspension parts, dust boots, and bearings (to name a few) — these items are prone to buildup and directly impact your 4×4’s off-roading capabilities when in a poor or filthy state.
Several materials are available online should you need a reference on cleaning your vehicle. However, never treat them like ‘blanket’ guides; methods vary depending on vehicle layout and application.
There are nuances between a 4×4 with a solid axle and one with an independent suspension. Other scenarios requiring specific cleaning techniques are as follows:
Dunes
Cleaning the undercarriage is crucial to prevent corrosion from sand and saltwater buildup. Use a high-pressure water hose to remove sand or debris underneath the vehicle.
Wash the exterior with a mild soap solution and a soft-bristled brush, taking care not to scratch the paint. For sand/dirt accumulation in the engine bay, a specialized cleaning product will do the trick.
Mudding
Remove as much mud and debris as possible from your rig’s body and undercarriage using a pressure washer or garden hose. For heavily-caked mud, a specialized mud remover product should help break it down before washing.
Use a high-quality soap solution and a soft-bristled brush to wash the vehicle exterior, working from the top down to prevent scratches on the body paint. Thoroughly cleaning the wheels and tires also prevents mud buildup in the treads from causing premature uneven wear.
Deep-water fording
The first step in aftercare for ORVs/OHVs participating in this sport is equipping them with a snorkel. However, water can still contaminate fluids and get into the transmission even with this solution. That said, sealing all vents and electrical components for added protection is recommended, as well as refraining from submerging the rig in water for extended periods.
Using a high-pressure water hose when cleaning your 4×4 is permissible. However, remove all electrical and vent covers and air the latter components out after.
If the vehicle was submerged in water for a prolonged time or beyond its fording depth capacity, consider employing the services of a professional mechanic for a thorough inspection and to ascertain there is no water damage.
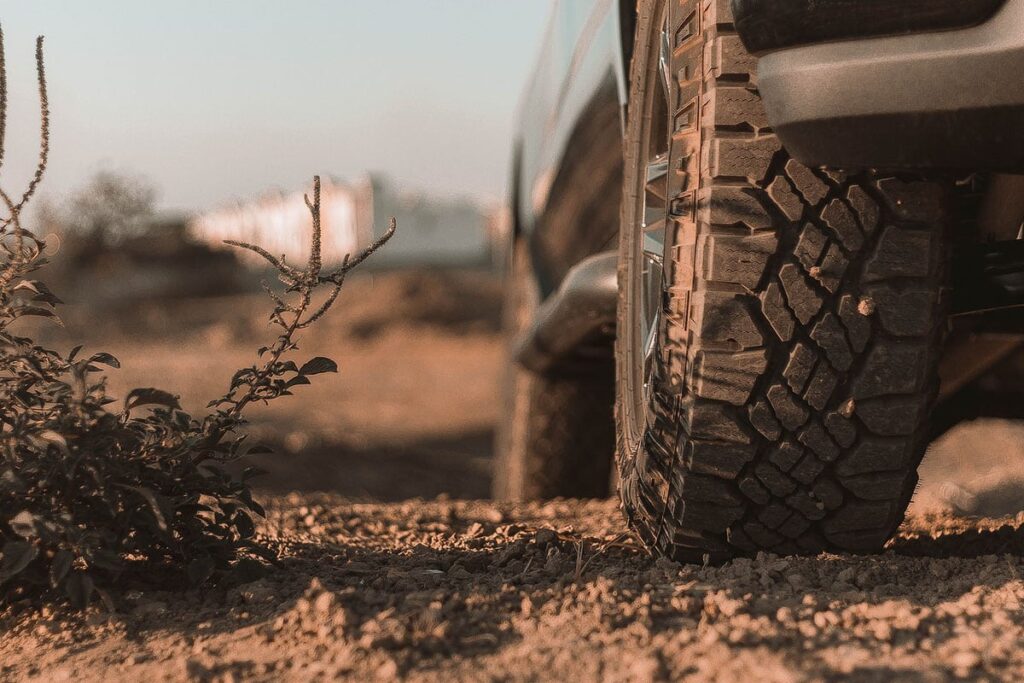
2. Reinflate tires.
Next, inflate your tires back to their proper cold-tire pressure after off-roading. Then, do it again the following day when cold-tire inflation pressure loss has taken effect.
While at it, inspect them for cracks, gouges, and foreign objects. Confirm all lug nuts and beadlocks are tightened, and check your spare tire carrier for damage.
On the topic of tires, some folks recommend overinflating them slightly to prevent flat spots. While this is true to an extent, the practice is generally not recommended — especially if your rig is merely side-hustling as a weekend warrior.
Overinflating the tires even by a tiny bit can cause excessive wear on the center of the tread and decrease overall lifespan. Additionally, it can lead to a harsher ride and reduced road traction. So unless your vehicle is bound for extended storage after your adventurous stint, it is better to reinflate your knobbies to spec.
(TIP: If you have fitted your 4×4 with heavier, larger-than-stock tires, inspect the spare tire carrier for signs of stress along the weld lines.)
3. Check for damage.
Once your vehicle is all spic-and-span, take a thorough look at it to check for any damage to the undercarriage, under the hood, suspension, and body. Specifically, pay close attention to the following parts — brakes, pads, calipers, brake lines, shocks, and axles.
Repair any leak or damage as soon as possible to prevent further issues. Otherwise, the replacement of damaged components would be necessary.
4. Assess the engine compartment.
As you open the hood, scan the engine bay for any signs of leakage from the power-steering pump and hoses, especially if your vehicle has a hydraulic power-steering system. Don’t overlook any slow leaks in the cooling system, as these can go unnoticed and ultimately result in serious engine damage due to overheating.
If you haven’t outfitted your vehicle with a wading kit, inspect your engine and transmission oil for any contaminants that may have seeped in. For 4x4s taken through water crossings or sandy terrain, it is imperative to have the differential axle lubricated as soon as possible to prevent bearing failure. As a general guideline, replace fluids compromised by harsh off-road conditions.
5. Perform a diff lock check.
Regardless of the severity of terrain and riding conditions, differential lockers always suffer when off-roading. By design, these components can take a lot of abuse. However, this capability wanes with wear and age.
There are heavy-duty covers that protect these components. Yet having these extras on your rig does not make your diffs impervious to cracks, dents, or leaks. If anything, they only provide your differentials with a slight protective edge.
That said, it is vital that you inspect the locker mechanism of your diffs after every off-road adventure. Do so by jacking your vehicle, removing the protective covers, and checking locker gears and clutches.
If there are no issues, clean and re-grease the differential lockers before reassembly. Ultimately, these steps will guarantee the longevity and reliability of your drivetrain and wheeler.
6. Tighten steering and suspension components.
To ensure all bolts are tightened, and steering components are securely mounted, use a torque wrench to tighten all bolts to OEM-recommended torque specifications. Next, visually inspect all steering and suspension components to ensure they are correctly seated and aligned.
Scrutinize the components for indications of wear, damage, or corrosion that could potentially affect their functionality. Then, take the vehicle for a test drive to ensure the suspension system works properly, and the steering feels responsive. During the test drive, listen for any unusual noises or vibrations that could mean an issue with the components.
7. Examine fluid quality and levels.
Following visual inspection, inspect all fluid lines and the state of the fluids — engine oil, transmission fluid, brake fluid, radiator fluid, power steering fluid, windshield washer fluid, and antifreeze (to name a few).
You do not necessarily have to change them after every outdoor adventure. Still, it is a good practice to examine them for signs of contamination or an impending mechanical problem.
8. Lubricate moving parts.
Off-roading exposes a vehicle to harsh conditions such as dust, dirt, and water, causing the drivetrain, chassis, and suspension components to accumulate debris and lose lubrication. Lubricating these moving parts after off-roading can help prevent wear and tear, reduce friction, and prolong the lifespan of the vehicle’s components while ensuring smooth operation and reducing the likelihood of breakdowns and costly repairs.
9. Respool your winch.
I’m sure some of us have been guilty of forgetting to respool our winch after use (or do so correctly) at least once. We may have done so inadvertently or simply do not know how. Whichever the reason, ensure your winch is properly respooled before parking your rig in the garage (especially if you used it during your trip).
Spooling a winch is easy — start by running the cable all the way out and inspecting it for any damage or wear. Next, carefully respool it (making sure it is neat, tidy, and ready for next use). If you did a full-on recovery with your winch, take time to clean and organize all tools and gear utilized.
10. Safely stow your vehicle.
Whether your off-roading ‘poison’ is a motorcycle, ATV, or a 4WD vehicle, it is a sound choice to store it in a dry, covered area to prevent damage from the elements (especially if you are not planning to use it for a while). Even if it is your daily driver, give your wheeler its well-deserved rest.
Giving it a contaminant-free space means keeping your garage or shed clean and free from clutter and rodents. Alternatively, use a high-quality cover for outdoor use if indoor storage is unavailable.
Conclusion — Off-Road Maintenance Tips
To recap, below are before and after maintenance pointers for off-roading:
Pre-Care:
- Load up on fuel.
- Fully charge the battery.
- Double-check filters and fluids.
- Inspect and maintain tires.
- Check for looseness and damage.
- Examine suspension, brakes, and steering.
- Protect the lighting assembly and exterior.
- Brace for unforeseen mishaps on the road.
- Test your 4×4 system.
- Gear up for the ride… and the weather.
Aftercare:
- Hose down your vehicle.
- Reinflate tires.
- Check for damage.
- Assess the engine compartment.
- Perform a diff lock check.
- Tighten steering and suspension components.
- Examine fluid quality and levels.
- Lubricate moving parts.
- Respool your winch.
- Safely stow your vehicle.
These processes may seem like a handful at first. But when done religiously, the benefits you reap will be worth all the effort (and patience!) afforded this repetitive task.
All things considered, toughing out the outdoors on a fully-functioning, reliable off-roading machine is the best feeling ever. And this can only happen if you put in the work before and after each ride.
Kris is an avid off-roader and outdoor enthusiast who loves to brave the elements and take on challenging terrain. He also enjoys sharing his passion and knowledge with others so that they, too, can appreciate the ride.
About Kris