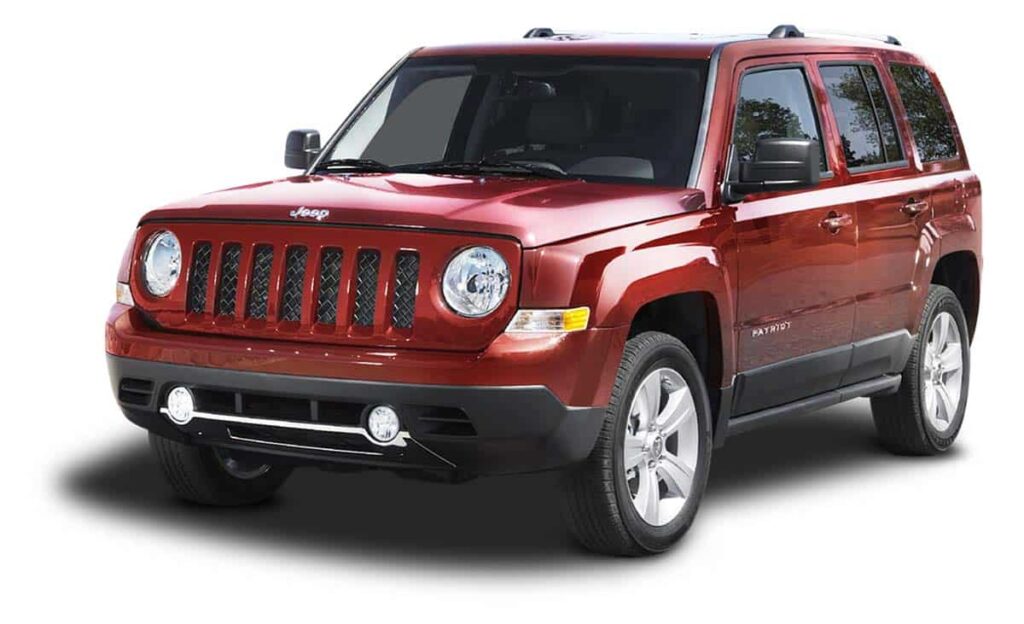
Of all the Jeep labels, the Jeep Patriot has been shunned by the off-roading community as not being “Jeep enough” in its styling and mannerisms. Although the vehicle is categorically a crossover SUV, its application is mainly that of a city driver or family vehicle more than an adventure companion. But those days are long gone. With the advent of lift kits, a more robust lifted Jeep Patriot is becoming the new normal.
Getting a Jeep Patriot lifted is relatively easy, with 2-inch lift kits capable of dramatically improving performance. However, going for larger performance kits may prove challenging, given the 4×4’s design limitations. Hence, ruling out the best lift kit would rely heavily on the intended application.
This guide will review the benefits of installing lift kits, detailed installation steps, and lift kit recommendations. So whether you are prepping your vehicle for an upcoming outdoor adventure, improving its drivability, or simply giving your Jeep Patriot a breath of fresh air, this article is right for you!


Why Install a Jeep Patriot Lift Kit?
It is no secret that Jeep owners install lift kits in their Patriots for cosmetic and off-roading reasons. Whichever the reason, opting for a lifted Jeep Patriot is almost automatically a wise decision as it not only makes the Jeep look good but also improves its performance off-road.
The only thing that will negate the advantages of a Jeep Patriot 4-inch lift kit (for instance) is when it becomes overkill and adversely affects the 4×4’s on-road capability.
Overindulgence aside, below are some of the benefits vehicle owners reap from installing a Jeep Patriot lift kit:
Benefits
- A Jeep Patriot lift kit (view on Amazon) can correct wheel misalignment or height disparities between your vehicle’s front and rear ends.
- It makes it possible to mount larger wheels on your Jeep Patriot while providing sufficient clearance to prevent tire rubbing and friction.
- Having a Jeep Patriot lifted adds extra support to the front end of your vehicle, preventing potential sagging. The same can be said for your 4×4 undercarriage.
- Suspension lift kits improve pulling power, drivability, and trail capability – a needed advantage when doing lots of off-roading activities such as mudding, ripping through the dunes, and rock climbing.
- Getting your Jeep Patriot lifted adds to its overall styling and rugged appeal. The resulting taller stance almost automatically magnifies your 4×4’s badass look.
- Lift kits are a great way to personalize your four-wheeler and prep it for those weekend off-road adventures.
How to Install Jeep Patriot Lift Kits
The installation process for lift kits will vary in difficulty, depending on how many inches of lift you want for your wheeler. Anything below 2.0 inches is relatively easy. Conversely, anything higher will require some skill and special tools.
When Shock or Strut Replacement Is Involved
One example is installing an RRO (Rocky Road Outfitters) lift kit. The latter comes with instructions that detail exactly how the operation should be done. As the process involves the replacement of shocks and struts, the instruction recommends that you start at the back of the vehicle and use two (not just one) jack stands. AFF Heavy Duty Pin Type Jack Stands (view on Amazon) should do the work.
Jack Stand
According to Patriot-dedicated forums, the jack stand points on the Jeep Patriot are quite prominent, as they are “flat with an oval-shaped hole inside the reinforced pinch weld” where you would position the jack. Others have tried to use only one jack when accessing the rear shocks but found it much easier to do so with two stands raising the rear end evenly.
Veterans in these forums explained that there just would not be enough play to remove suspension parts and put them back with spacers if one tire is down.
Remove Tires and Bolts
Ideally, both tires need to be removed to expose the rear suspension better. In addition, you will need to unbolt the two 15-mm bolts holding the top of your shocks from inside the vehicle (after removing the spare tire and its cover from the trunk area). This step will take some patience since you would not have enough space to swing a ratchet very far when removing the bolts.
Once the tires and top bolts have been removed, proceed with removing the bottom bolts that go through the lower control arm to have enough room to take out the shocks and spring from the wheel well. These bottom bolts are slightly larger (around 18 or 19 mm).
You can drop the shocks through the control arm by tilting it out, end first. If this does not work, remove the bolt holding the hub to the control arm to gain more wiggle room.
Spring Compressor
When replacing strut bearings or springs, it is best to use a spring compressor like Amerbm Spring Compressor Tool (view on Amazon). Ensure the tool is interchangeable and can be used to extract strut coils so that you get your money’s worth.
The reason for using a spring compressor is that discharging the springs manually can get pretty catastrophic. Without this tool, it would also be difficult to undo the bolt holding the strut bearing. Note the locations and orientations of rubber boots or foam cushions as you do this step, but only if you intend to reuse them.
When Doing a Simple Lift
Provided you have replaced all bad components and put your suspension assembly back together (or have not touched it), you can proceed with doing a Jeep Patriot lift. The spacers bolt to the original mounting points at the top of the shock using stock nuts. Back spacers and shocks are directional, with a triangular tab that must face outward when installed.
Once spacers are installed, re-insert the assembly into the wheel well by doing the procedure above in reverse. Use the washers and nuts from the RRO kit.
Control Arms
Next, swap out the upper control arm (or camber arm) by installing the grease nipples and greasing the bushings before installation. Disconnect the bottom of the control arm by removing the large bolt that holds it in place. Then disconnect the top by loosening the bolt with a wrench or ratchet.
Lay your control arms side by side and adjust the new ones to approximately 1/8″ longer than the stock size. After which, install your new control arms. The grease nipples may not want to fit with the new control arm. If that happens, plug the holes with a cap screw as a last resort if unable to install with the grease nipples on. Now, put the rear wheels on, set the back end down, and move to the front.
Front Spacers
When installing front spacers, it is easier to do so one at a time instead of all at once. Begin by lifting one of the front corners of your Jeep Patriot with a jack stand and removing the wheel on that side. Afterward, move into the engine bay and undo the nuts holding the top of the strut.
Remember to support the steering knuckle to prevent it from falling freely when disconnecting the strut. Otherwise, your CV axle can get detached, which would then require removing your steering knuckle and popping the axle back into place.
Disconnect the Sway Bar
Subsequently, disconnect the sway bar with a wrench and an Allen key set like Eklind 60625 Power-T T-Handle Hex Allen Wrench T-Key Combo (view on Amazon). Using your Allen key to hold the bolt in place, undo the nut holding the sway bar to the strut, and move the bar tie toward the vehicle’s rear to get it out of route. Likewise, remove the bracket holding the brake lines by freeing it from the steering knuckle.
At this point, you should be left with a pair of large bolts (approximately 21 mm in size) holding the bottom of the strut to the steering knuckle. These bolts are found in the center of the brake line and sway bar brackets behind the brake rotor.
If you need to replace parts, you will have to disassemble the front strut as you did with the rear. Apart from using a spring compressor, you may also need a specialty wrench and socket-style tool to reach down into the strut bearing. Throw in a drill or impact gun like Ingersoll Rand 2850MAX 1″ Drive Air Impact Wrench (view on Amazon), as the spring compressor can be painfully slow on its own.
Attach Sway Bar Adapter
Front spacers bolt to the top of the struts with the nylock nuts and washers supplied by RRO (or, in your case, your lift kit of choice). The orientation of the front spacers is inconsequential. What matters is attaching the sway bar adapter to the new strut with the hardware supplied in the lift kit. Once you equip the strut with a spacer and a sway bar adapter, put it back in place using all the factory hardware.
Once installation is complete, bend the bracket for the brake lines to ensure they are not subjected to excess tension. Then install your wheels and set the Jeep Patriot down on the ground. After successfully releasing tension from the brake lines, install the appropriate rims and tires with your lifted Jeep Patriot. And do not forget to do a test drive to ensure your lift kit is fitted and working properly.
Jeep Patriot Lifted Cost
On average, expect to spend between $500 and $5,000 to have a lifted Jeep Patriot. But ultimately, actual expenses will largely depend on the lift size, lift kit inclusions, and whether you are going for generic aftermarket or OEM parts. Owning a 2-door versus a 4-door Jeep also makes a difference in your lift kit choice.
If going for a Jeep Patriot 3-inch lift kit (for example), it is a must to account for the pricing of replacement tires and rims. The same goes when opting for larger performance lift kits. 3.5-inch lift kits will require different control arms and longer shocks. Similarly, 4-inch lift kits will likely need longer upper control arms.
The below top picks should give you an idea of how much you will need to spend (given you are doing the installation yourself).
Best Lift Kits for Jeep Patriot

(** Price not specified, currently unavailable, out of stock, or not available in Amazon)
Rocky Road Outfitters
Rocky Road Outfitters 2-1/8″ Jeep Patriot Lift Kit (Patent Pending)**
This is the top choice for Patriot enthusiasts, as it has been proven and tested to give the vehicle considerable gains when installed properly. It includes front and rear strut spacers, rear upper control arms, sway bar extensions, camber bolt packs, and step-by-step instructions with pictures, enabling even novice Jeep owners to do the installation themselves.
Some drivers reportedly had problems with the RRO spacer being too tall (1 3/4″), causing inner CV joints to bind. Adding sub-frame spacers to eliminate vibration has been done as a band-aid fix. But according to Rocky Road Outfitters, this will not be necessary if installers follow lift kit instructions to the T.
Performex
PART #1009 | Performex Jeep Patriot 2WD/4WD 2.5″ Front and Rear Booster Lift Kit 2007-2019**
While this lift kit does not come with alignment hardware, it is similar to the RRO lift kit in that “it is a spacer that mounts to the top of the strut using what are essentially ATV wheel spacers.” These spacers measure about 1″ and do not expose the CV axle to as high an angle as the RRO lift kit.
Moreover, the strut spacers are constructed from high-quality, durable polyurethane and steel that do not break or deform under extreme driving conditions. Many Patriot owners prefer this option over the RRO lift kit as they swear by the absence of vibration/binding.
Daystar
Daystar Suspension 1.5″ Leveling Kit Compatible with 07-17 Jeep Patriot (view on Amazon)
(Part #KJ09169BK) This kit includes front and rear progressive-rate polyurethane coil spring spacers (two each) and dual front sway bar end-link brackets. It requires no strut disassembly, is FMVSS126-compliant, and entails 100% bolt-on installation.
After installation, the kit lifts your Jeep Patriot by 1-1/2″ and clears 28.5-inch tires on factory wheels. Best of all, the lift kit is covered by Daystar’s exclusive lifetime warranty.
Stu’s Coils
Stu’s Coils Lift Kit**
Unlike the Performex leveling kit, Stu’s coils lift kit provides alignment hardware. Lift is achieved via a different spring rate which controls spring compression under the vehicle’s weight compared to stock.
The only downside is that owners get a firmer ride in return – a worthy trade-off for reduced propensity to bottom out and not a big deal if you are big on off-roading. Plus, the range of travel for inner CV joints is unaffected and remains the same as stock.
With this kit, disconnecting sway bars for better articulation is an option. It is also one of the safest kits if you do not want to worry about vibration, alignment, or CV joint issues.
Special Mentions
- Rough Country N3 2″ Lifted Strut Pair for 2010-2017 Patriot – 501093 (view on Amazon)
- Rough Country 921 1″ Upper Strut Lift Spacer (view on Amazon)
Conclusion – Lifted Jeep Patriot Guide
In truth, a lift kit is not as necessary in a Jeep Patriot as in other Jeep labels that are more oriented for off-road sport. The vehicle’s intrinsically limited torque and inadequate low range further prove this point.
That said, going for significantly larger knobbies may not always be the best option for these four-wheelers – which is why Jeep Patriot 4-inch lift kits are hard to come by in online search results.
So unless you are an off-roading enthusiast and use the vehicle for this purpose, it is better to leave the stock suspension assembly as is. Or you can acquire a set of 15-inch wheels with 3.5″ to 4″ backspacing and 28″ tires to get that lifted Jeep Patriot look without much hassle. As with all other vehicles, lift kits add wear on stock suspension parts, typically resulting in premature servicing and replacements.
Bottom line? Think twice before deciding on a lift kit installation. But if you push through with the change, exercise caution and lots of patience to avoid calibration issues, misalignment, or irreversible mistakes.
Kris is an avid off-roader and outdoor enthusiast who loves to brave the elements and take on challenging terrain. He also enjoys sharing his passion and knowledge with others so that they, too, can appreciate the ride.
About Kris