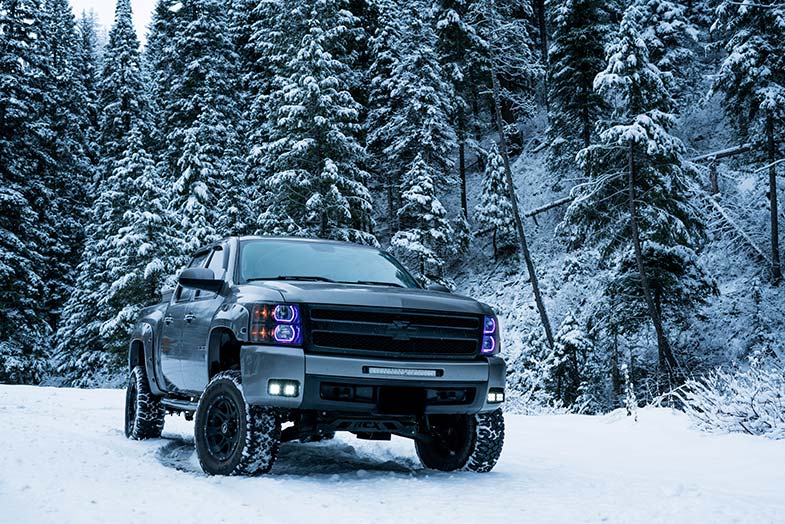
The 4WD actuator is one of the many components that a 4WD vehicle has. It is crucial to the seamless performance of your Chevy truck or vehicle – especially off-road. This article will dive into how it works, what makes it act up, and whether or not bypassing a Chevy 4WD actuator is the right thing to do.
Performing a Chevy 4WD actuator bypass entails modifying your old actuator, flipping the shifter fork, and installing free wheel hubs to serve as your pseudo-4WD setup. Your vehicle’s year, make, and model will ultimately determine the number of steps needed.
Here are four ways how to go about your Chevy 4WD actuator bypass:
- Use your vehicle’s old actuator as the bypass.
- Flip the shifter fork in the actuator the other way around.
- Remove vacuum lines from the actuator and plug them up.
- Install free wheel hubs.
Older versions of 4WD actuators on Chevrolets and other similar makes have been known for their short lifespan, proclivity to damage, and design flaws. The good news is that recent actuators for these trucks have tremendously improved and engage a lot faster and better. If you go this route, expect some superficial differences between the old and newer versions of the Chevy 4WD actuator.


What Is a 4WD Actuator?
Before troubleshooting or bypass procedures, it’s important to fully understand what a 4WD actuator is and what it does.
A 4WD actuator is responsible for locking a vehicle’s differential, enabling its selectable 4WD mode. It also controls traction and the amount of torque into each tire. Depending on make and model, this component is actuated via a push-button, switch, or shifter like a B&M 80690 Mega Shifter (view on Amazon).
The latter then sends the signal to the 4WD axle actuator. This, in turn, locks the differentials with either vacuum hoses or electronic solenoids and a shift-and-fork mechanism. Once done, all four wheels of the said vehicle work together as a single unit, dramatically enhancing its off-roading capabilities (specifically on low-traction terrains and slow-crawling sections).
When an Actuator Goes Bad
A 4WD actuator (view on Amazon) isn’t indestructible like all other vehicle components. The ground on the 4WD actuator can easily get corroded by salt and other contaminants. Furthermore, its underside location makes it prone to scruffs and water – factors that eventually cause a short circuit or signal failure in the 4WD actuator relay system.
You’ll know your actuator has given out when either the 4H or 4L drive mode gets stuck, takes too long or becomes difficult to engage, completely fails to activate, or its lights blink non-stop and never stabilize.
Because of how the actuator functions, its non-engagement is typically dismissed as an electrical or wiring issue (and seldom as a mechanical fault).
Similarly, when vehicle owners encounter a non-working shifter or push button, they blame it on the transfer case. However, the fault is caused by the 4WD actuator itself. Given the part’s propensity for wear, this shouldn’t come as a surprise.
Mechanically-savvy drivers consequently opt for a Chevy 4WD actuator bypass. It’s a considerably easy DIY task since the actuator is next to the front differential (if not near one of your truck’s wheel wells or at the top of the engine bay). But despite the straightforwardness of this procedure, deciding whether or not to perform a 4WD actuator bypass should heavily rely on the vehicle’s application.
Even if you’ll only use 2WD or do on-road driving in the interim, tarrying on fixing your actuator can still lead to severe drivetrain damages (not to mention expensive repairs).
How to Test Chevy 4WD Actuator
If you notice early signs of delayed 4WD engagement, then following these troubleshooting steps should help. They not only work for the said truck but for other vehicle makes as well:
Steps:
- Prep your vehicle by turning the ignition on and waiting for the dash lights to fully illuminate.
- Once it does, turn off all vehicle accessories, then start the engine again. Doing so should allow the truck to operate at four different speeds (including reverse) when you take it out for a test drive. Perform this check without flooring.
- Inspect the fluid level in the reservoir tank if sufficient. If filled up to spec, ensure that fluids are not contaminated. Additionally, check for leaks in the tank and other fuel system components.
- Repeat step #3. But this time, test how well each speed works while flooring. Test all reverse and forward gear ratios and note any jerking or other unusual truck behaviors as you drive.
- Conduct a manual resistance test on your 4WD actuator by pressing its tip with your finger. You’d know the actuator has not gone bad if you get no resistance. Otherwise, you’ll need to replace the part right away.
Additional Step
These steps are precautionary and are ideally done on a 4WD actuator assumed to be in a healthy state. The moment you encounter anything out-of-norm (like the actuator being stuck in one position or with no power), you’ll need to perform these additional steps:
- Using two driverless currents, connect one end of the wire of the 1st one to any good solid metal ground location on your truck and the other side to an unpainted area on your truck’s frame. Do the same with the 2nd driverless current but connect one end of it to any part of the engine bay while making sure belts and hoses aren’t covered up. If doing either doesn’t set your 4WD actuator right, then it’s time for a replacement.
When Should 4WD Actuators Be Replaced?
On average, 4WD actuators should be replaced every 20,000 to 25,000 miles – regardless of whether you experience any issues. This schedule should come earlier for GMC or Chevy trucks that have been in an accident or 4×4 vehicles that have incurred damage to their engine bay.
That said, performing the first six steps in this section is crucial to ensuring the uninterrupted function of your 4WD actuator and your four-wheeler.
How to Do a 4WD Actuator Bypass Fix

1. Use Your Vehicle’s Old Actuator as the Bypass.
You can bypass the system using your old 4WD actuator. Drill out a three-rib pit to pull it apart, then turn the little shaft you see counter-clockwise until fully extended. Once you’ve sorted that one out, place just that part back into your vehicle or truck. It may be difficult to thread due to the spring that engages the front, but you should still be able to put it back.
This fix allows your 4WD mode to be in limbo until activated when you engage it via your manual transfer case.
2. Flip the Shifter Fork in the Actuator the Other Way Around.
Another workaround is to tinker with the shifter fork inside the actuator. This time, you no longer need to take it apart. Just remove the four 11-mm bolts and c-clips that hold the shifter fork in place, and flip it the other way. After you’ve flipped it, clog the air ports no longer in use with some rubber line and zip ties.
Similar to the preceding step, this will render your 4WD mode inactive unless you shift the transfer case to 4WD. Its downside is that it fully disables your truck’s selectable 4WD mode – unless you mate this fix to an aftermarket cable kit that’ll still allow your actuator to retain its ‘selectable’ function.
Additionally, it may adversely impact your four-wheeler’s fuel mileage, given that your axle shafts and front driveshaft are turning all the time and creating additional drag.
3. Remove Vacuum Lines From the Actuator and Plug Them Up.
This step is not only exclusive to a Chevy 4WD actuator bypass fix but also applies to all other vehicles with a vacuum-type actuator. These systems are in 4WD and can only come out of driveline mode once the engine vacuum is applied.
The best way to bypass their 4WD actuator is to cut the vacuum supply to the system by removing the vacuum lines from the actuator and plugging them up.
To ensure the vacuum supply is shut, plug the supply line and the line to the actuator with a pop rivet head. Essentially, you only need to plug the supply line. However, plugging both ensures that moisture and contaminants are out of the vacuum lines.
Although this is a very effective bypass method, only temporarily do this. It would still be best to resolve your 4WD actuator problems permanently. Furthermore, this method will only work if the 4WD actuator fails in the locked/engaged position.
4. Install Free Wheel Hubs.
In addition to adjusting the shifter fork and plugging vacuum lines, installing free wheel hubs (view on Amazon) also helps bypass the 4WD actuator of a Chevy truck or vehicle.
Ford, for instance, makes use of a vacuum-actuated assembly that locks front axles to the wheel hubs while in 4WD and allows axles to free-wheel outside of the driveline mode. However, this setup can only stretch rubber diaphragm life up to 80,000 miles before the part deteriorates, leading to vacuum leaks and actuator problems.
A more permanent solution is the use of permanent-lock wheel hubs (similar to the factory design of Jeeps). They lock the front axles to the wheel hubs full-time but with no adverse effect on 4WD functionality.
Some aftermarket designs of these free-wheel hubs have vacuum ports where you can connect vacuum lines originally part of your vehicle’s setup. However, you’ll still need to be very particular in selecting which brand would be the best fit for your vehicle. Some options may be compatible with some but not others – depending on whether you have a pneumatic, hydraulic, or electrical type of actuator.
How to Install a New Chevy 4WD Actuator (Chevy Pickup)
For this procedure, you’ll need the following tools:
- 8-mm wrench/socket/ratchet
- 7-mm, 1/4 inch, and 13-mm sockets with ratchet and extension
- Pliers
- Small flat-blade screwdriver
6 Steps:
- Before servicing your GMC or Chevy truck, refer to precautionary guidelines specified in your owner’s manual.
- To access the actuator, pop the hood and remove the battery (taking caution not to drop or lose the clip holding it in place). Then remove the bolts you see there and the two 13-mm bolts underneath the right wheel well.
- Carefully disconnect the vacuum lines from the actuator, ensuring that the cable is not bent or deformed.
- You should be able to take out the 4WD actuator, including the bracket to which it’s connected. Depending on how old or rusted your vehicle is, you may need to go down a 1/4-inch standard size to unscrew the 7-mm bolts holding down the actuator to the bracket.
- Once the old actuator is separated from the bracket, you can proceed to replace it with a new actuator. Perform steps #2 to #4 in reverse to reassemble the actuator system. Tighten the bolts until they’re snug, but don’t overtighten them.
- Should the clip holding the battery tray get knocked off, you’ll need to remove the right headlight to fish it out (it typically falls in that area). Use a magnetic extender to pick it up, as you’ll need that clip to put the battery tray back in place.
Disengage 4WD Mode
When replacing the 4WD actuator, ensure that the 4WD mode is disengaged and electrical connections to the dash are removed.
Depending on where the actuator is, you may or may not need to jack up your 4×4. For most Chevy pickups, it is underneath the battery tray. You’ll need it parked indoors and have the hood popped open.
For other models like the Chevy Suburban 1500, it is underneath the vehicle next to the front differential. Hence, you’ll need to prop it on a garage ramp or jack up the front for better clearance. Other than this, replacing the 4WD actuator on these trucks is easier.
Test the Replacement Actuator
Some drivers who’ve done a 4WD actuator swap at least once will advise you to test the replacement actuator first before screwing it in place and taking your truck out for a spin. Honestly, doing so will entirely be your discretion since there isn’t much difference in effort whichever way you go about putting in the new actuator in your truck.
Either method works fine, but screwing the replacement actuator in place to test it personally makes more sense. You’d be able to immediately see improvements in your shifter or push-button response as you drive.
How Much Does a 4WD Actuator Cost?


The cost of a 4WD actuator varies from one vehicle to the next and depends on whether it’s only the actuator itself or the entire 4WD actuator relay system that’s affected. Furthermore, each actuator has a design unique to the mechanism of a given make and model.
Nonetheless, average expenses can range from $20 – $300. The higher end of this price spectrum already includes mechanical work costs in replacing the 4WD actuator.
If you suspect other components are also affected, check on the shift fork, locking collar, IWE solenoid, vacuum lines, and gears. Like the 4WD actuator, these parts are very prone to internal damage and seizing as they’re also subject to excessive friction (or constant movement) and moisture. You’re in luck if they check out. Otherwise, expect at least $30 to be added to your repair expenses.
| Component | Estimated Cost |
|---|---|
| Locking Collar | $30 – $250 |
| Actuator Toggle Switch | starting at $60 |
| IWE solenoid | $100 – $590 |
| Manual Actuator Kits | starting at $150 |
| Shift Fork | $500 – $700 |
| Vacuum Lines | $150 – $1,000 |
Conclusion – Chevy 4WD Actuator Bypass
In summary, here are the four steps on how to perform a Chevy 4WD actuator bypass fix:
- Use your vehicle’s old actuator as the bypass.
- Flip the shifter fork in the actuator the other way around.
- Remove vacuum lines from the actuator and plug them up.
- Install free wheel hubs.
An actuator replacement or a full actuator system fix – not a bypass – would be the best solution to get your 4WD working again. Older model Chevy or GMC trucks have been known to have poorly-designed 4WD actuators, which caused a lot of 4WD mode problems.
Thankfully, OEMs have already corrected these design flaws and developed better-performing actuators. Never hold back on a Chevy 4WD actuator upgrade – doing so will make a world of difference in your vehicle’s performance.
Kris is an avid off-roader and outdoor enthusiast who loves to brave the elements and take on challenging terrain. He also enjoys sharing his passion and knowledge with others so that they, too, can appreciate the ride.
About Kris