Knowing how to take air out of a tire is a crucial skill for vehicle owners, no matter the type of machine they have. This knowledge is essentially a requirement, whether you suddenly get your tires punctured or are off to your next off-road adventure. Understandably, the whole process can be daunting for a beginner driver. Not to worry – this guide will prove that it is not as intimidating as it seems. So, how do you let air out of a tire?
Airing down tires entails locating your car’s tube valve, using the right tools to hold down the metal pin, replacing the valve cap, and getting pressure readings before and after deflating tires. Completing the process takes a few minutes or longer.
To be more specific, below are the steps on how to let the air out of a tire:
- Determine the type of tube valve your tire has.
- Open the top rubber cap protecting the tube valve.
- Do a tire pressure test.
- Press down the valve pin and deflate your tire as needed.
- Use a metal object on the valve stem for seamless air release.
- Close the valve cap.
You can remove the inner valve or pull the tubeless valve off completely to purge air from your tires faster. But if you are not deflating your tires to be replaced, then following the steps in this guide is more advisable.
How to Let the Air Out of a Tire

1. Determine the Type of Tube Valve Your Tire Has.
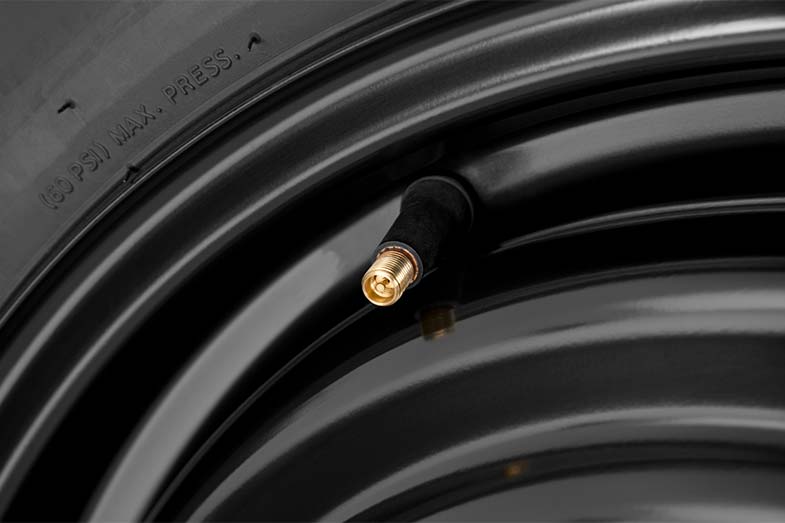
Since there are three types of tube valves, identifying which one you have enables you to deflate your tires more smoothly and with the right set of tools. Valve stems are typically located in the middle of the metal plating or between the spokes of a tire. They are pretty visible due to their slight protrusion.
Automobiles and off-road vehicles are thought to use the same tube valve, but they don’t. Similarly, you would be dealing with more than just one type for two-wheelers. To help you differentiate one from the other, here is a brief description for each tube valve type:
Schrader Valve (a.k.a. Car-Type Valve, Auto Valve)
A pneumatic valve type is either partially wrapped in rubber up to the valve thread or fully threaded for a lock nut. It is named after the Schrader Company, founded in 1844, and is probably the most popular tube valve, tested and proven on various applications. Often compared to the Presta valve, it is wider and shorter than the former – with a shaft that usually measures about 36 to 40 mm. Its one-way airflow valve mechanism makes it easy to inflate and deflate.
Presta Valve (a.k.a. Sclaverand Valve, French Valve)
This type is preferred for use on racing/road bike tubes and wheels since its long, thin shape and 6-mm diameter creates a smaller hole in the rim. It is available in different lengths (from 36 to 80 mm) to suit the wheel profile of a given vehicle. Aside from a valve cap, it has a brass cap that must be unscrewed first before a tire with this tub valve can be effectively deflated.
Woods Valve (a.k.a. English Valve, Dutch Valve)
It is the equivalent of Presta valves in the UK and is an improved spin-off of the Dunlop valve. Despite being the most common valve type in the world, it is overshadowed by the Schrader valve’s popularity. This type is somewhat a cross between the first two tube valves, with its size similar to a Schrader’s and its inflation style to a Presta’s. It is often seen on the inner tube of road-style/mountain bikes and maintains high tire pressure without losing air.
Automobiles per se use either a rubber snap-in, high-pressure snap-in, or high-pressure metal clamp-in tube valve. Older car applications, on the other hand, also make use of Schrader valves, with specific sizes as follows:
- TR4/TR6 valve stems that fit motorcycles and small Voiturette cars with an 8-mm diameter stem hole
- TR13 rubber stems/TR11 metal stems that fit vehicles with an 11.5-mm diameter stem hole
- TR15 stemmed inner tube that fits most tractors and cars from the 1940s and 1950s (post-WWII)
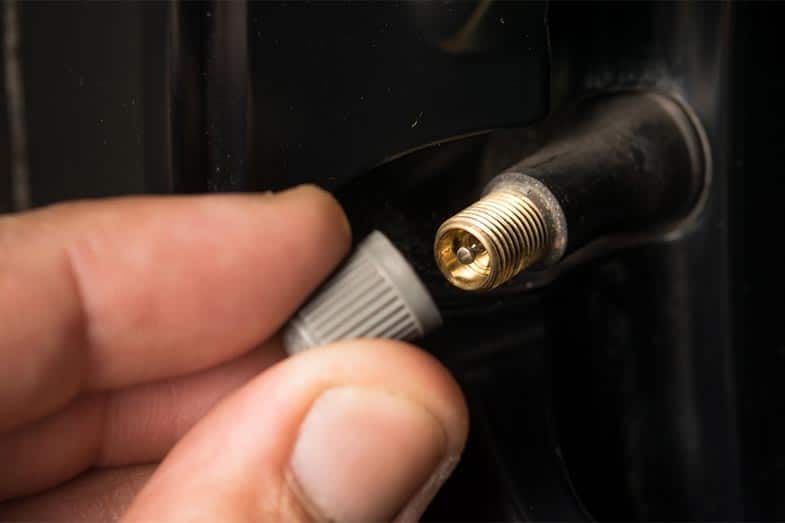
2. Open the Top Rubber Cap Protecting the Tube Valve.
Take the rubber cap off the valve stem by rotating it counterclockwise – this should reveal a metal pin with a circular shape in the center of the valve stem. The valve cap is usually colored black and relatively easy to lose on a tray of the same color. So as not to misplace it, keep the rubber cap in a safe place or a clear plastic bag.
3. Do a Tire Pressure Test.
Don’t just deflate your tires straight away. Perform a pressure test first to see where your current cold-tire pressure is at or how overinflated it is – this way; you’d know how slowly you would have to air out. Testing your tire pressure requires accuracy and meticulousness, so be cautious and patient when getting readings.
Choosing between digital and analog pressure gauges is a matter of preference. But if you want highly-accurate pressure readings, I strongly advise going digital. Digital pressure gauges like Milton Precision Digital Tire Pressure Gauge S-587e (view on Amazon) are not only resistant to overpressure spikes and vibration but also more bulletproof. This is not to say that analog gauges are second-fiddle. However, digital ones come with backlit screens (for low-light readouts) and are generally easier to read.
4. Press Down the Valve Pin and Deflate Your Tire as Needed.
After completing a pressure reading, the next step is to deflate your tire. Some vehicle owners can press down the valve pin by hand. But for most of us, using a tool that holds down the metal pin works better. You should feel a slow vapor release from your tire when done correctly.
Many car owners affirm that unscrewing the metal pin inside the valve stem – using two 5-inch needle-nose pliers – makes your tires purge air much quicker. Conversely, others say that using a flat-head screwdriver to press down the valve stem is already enough to hasten air release. With bikes, all you need to do is lay the tire flat on the ground and push down on it.
5. Use a Metal Object on the Valve Stem for Seamless Air Release.
As mentioned, depressing the needle usually enables air to self-purge from the tire. But in some cases, doing this isn’t enough. Get a flat-head (or any other type of) screwdriver and place its tip over the top of the valve pin, pressing it inward. Doing this helps the tire release air continuously through the valve stem. If you do not have a screwdriver close by, a ballpoint pen, nail, ignition key, or any of these other items will do the trick:
- Pin cap
- Needle-nose pliers
- Corner of the inflator gun (at pump stations)
- Valve core remover
Tip: Take extra care when using needle-nose pliers to aid in airing down your tires, as it can cause damage to the valve stem if held down too hard. Also, avoid unnecessary pulling and pushing. As for corroded valve pins, you need a propane torch to heathen up the corroded part before applying pressure on it.
During this step, you may have to check your pressure gauge repeatedly until you get the tire pressure right. But do not feel bad – even seasoned mechanics do this. And believe me, you would not want to air down your tires beyond their limit. It would be pretty dangerous if you do, as your rims could potentially dislodge from your tires while you are on the road.
6. Close the Valve Cap.
Once done with airing down your tires, make sure to secure the rubber valve caps on all of them. Loose valve caps result in an air leak that can leave you pulling over the roadside mid-traffic.
When to Air Out Your Tires
Recent-year vehicle models have TPMS (Tire Pressure Monitoring System), which alerts the driver when significant under-inflation occurs. Unfortunately, it does not light up when there is overinflation. Hence, regular tire pressure checks and understanding when it is appropriate to air down your tires are vital. Here are a few situations that warrant letting air out of your tires (a great reference for inexperienced car owners!):
During a Tire or Tube Change
When servicing or replacing your tire altogether, it is mandatory to let air out of it. But before you do, you will need a car jack, and jack stands to lift your car. If you are to do a complete tire replacement, it is recommended to remove the entire wheel before airing down the tire for easier deflation and removal. Make sure that the entire vehicle is propped on a solid, flat surface before you get things started.
For Vehicles in Transit
Although not required, some owners let air out of their tires to take some weight off their machine, making it less hefty and easier to transport. It may be unnecessary for some. But for those trying to fit their wheelers in a cramped vehicle or a small cargo bed, letting air out of the tires is a tremendous help.
Front and Rear Tires Do Not Feel Evenly Inflated
Balancing out the inflation of all your tires is crucial to tread life longevity and your safety on the road. Misinflated tires result in uneven tire wear and compromise tire-and-wheel performance. In this situation, you will need your trusty tire deflator and air compressor.
Changes to Ambient Temperature
High temperatures can make the air inside your tires expand by 1 psi every additional 10 °F. As such, you will need to air down your tires during warmer seasons or if you live in an area with frequent or sudden climate changes.
Fixing a Puncture
Although more likely to occur on bikes, punctures could also happen to tires used on automobiles, ATVs, and motorcycles. It depends on the road conditions where you drive. But regardless of vehicle, the approach to the problem is the same – you take the entire wheel off, diagnose the puncture point, and then deflate the tire to fix the puncture.
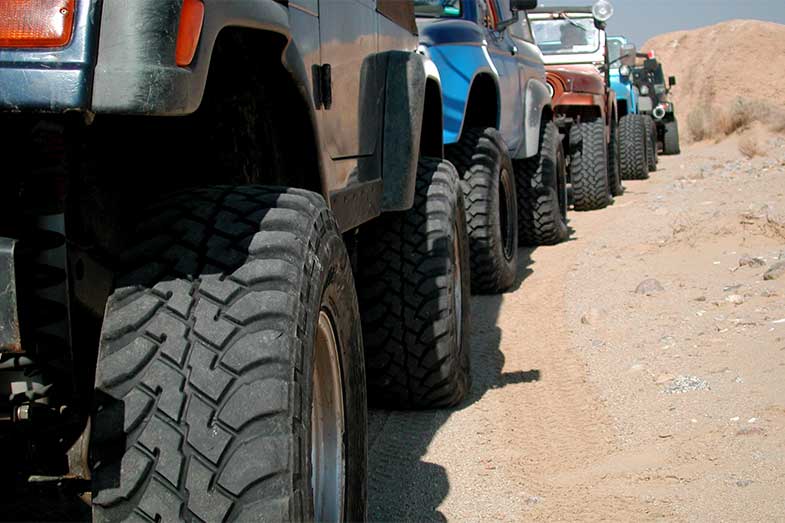
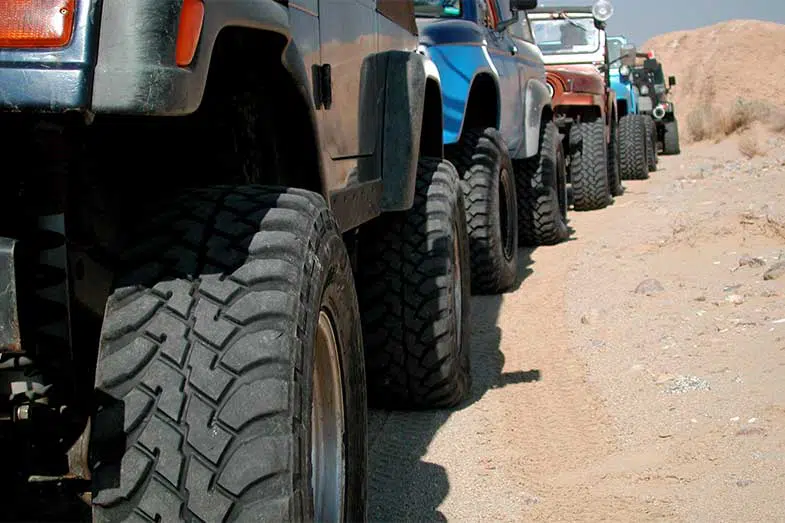
For Improved Traction When Off-Roading
Off-roaders know this all too well – they have been figuring out the right tire pressure all this time through hit-and-miss. Consequently, this trial-and-error system helped form current guidelines on how much air needs to be let out for better grip. Depending on different types of terrain and riding conditions, below are the recommended degrees of deflation (based off OEM-recommended tire pressure):
- Deflate by 25% – best for improving traction on uneven dirt roads, washboard obstacles, and moderate-level trails without being too soft to the point of adversely affecting speed or rider comfort.
- Deflate by 35% – yields a wider contact patch that enhances grip and softness, allowing tires to flex and mold around rocks (even slippery ones).
- Deflate by > 50% – ideal for driving on sand, mud, or other loose surfaces, as this setting increases tire flotation and helps free your knobbies from digging into sandy or muddy surfaces.
There is no cookie-cutter approach to deflating tires for off-road applications. If you are iffy about following the above deflation levels, then air out your tires moderately, drive, and see if the pressure needs to be adjusted further. Also, remember that momentum is key on off-road terrain (not speed), such as the dunes. Remembering this small fact will help you achieve the ideal tire pressure.
Correcting an Overinflated Tire
At some point, you may have been told that overinflating tires improves handling, reduces rolling resistance and aids in fuel efficiency. While there is some truth to it, take this advice with a grain of salt. Going beyond the maximum cold-tire pressure does more harm than good for you and your wheeler. At the very least, it is a sure-fire way to burst tires and burn money on more frequent tire replacements.
More serious consequences of overinflating tires are as follows:
- Loss of traction or hydroplaning (during winter) can occur, resulting in potential on-road accidents
- Center tread wear occurs at a faster rate compared to its outer edges
- Tires become more prone to damage caused by curbs or potholes
- The braking distance of your vehicle is adversely affected
- Driver assistance functions may not work properly
- Passenger safety is compromised
Optimum tire pressure specified in your owner’s manual is there for a reason – that is to ensure you get the perfect balance between tire tread longevity, driving comfort, handling, and fuel efficiency (among other things). That said, non-adherence to manufacturer recommendations can only mean the opposite of enjoying the benefits of a properly inflated set of knobbies.
Tip: Let your tires cool down for at least half an hour first before letting air out. This prevents inaccurate/false tire pressure readings.
Airing Down Tires Without Tools

Now that we have covered the simple steps on deflating tires, the question now is, ‘How do you let air out of a tire without tools?’ Well, it’s pretty much the same steps as above. But instead of a valve cap remover or a flat-head screwdriver, you can use these alternatives:
Peas
I know – this is not a staple in everyone’s car. But if you do have them, they are an ingenious way to deflate a tire. Just cut a piece in half, put it on the stem cap, and place the cap back in the tube valve. The pea inside will press down on the valve pin, deflating the tire in the process.
DIY Pressure Tool
Knowing how to do this comes in handy if you do not have an aftermarket pressure toolset in your garage but have bits and bobs that can create a makeshift one. All you will need are the following items:
- Hack saw
- 5/32 bolt
- Superglue
- Valve cap
- Paper clip
Cut the bolt down to size, depending on if you want your tires to deflate more quickly or at a moderate pace. Next, stick the bolt piece to the bottom of the cap with super glue. Lastly, use the paper clip to press the glued bolt piece until dry.
Here is another version of a DIY deflating cap that requires a different set of things to create, as follows:
- Plastic cap that fits your tire tube valve
- Blunt-ended screw
- Drill
Just drill two holes across the cap, insert the screw through those holes, and voila! You have a pressure tool you can push the valve pin with to let the air out from your tires.
Ideally, having the right tools – for instance, a tire deflator like J.T. Brooks Automatic Tire Deflators Pro (view on Amazon) – when letting air out of your tires is non-negotiable. But, understandably, you may not always have a complete tool kit with you nor be in the best of circumstances when the need for tire deflation arises.
Conclusion – How to Let Air Out of a Tire
To recap, here are the six steps on how to let the air out of a tire:
- Determine the type of tube valve your tire has.
- Open the top rubber cap protecting the tube valve.
- Do a tire pressure test.
- Press down the valve pin and deflate your tire as needed.
- Use a metal object on the valve stem for seamless air release.
- Close the valve cap.
Hopefully, you’ve realized that completing these steps is relatively easy and can be done by one person. All there is to it is recognizing what tube valve you have and having the right tools at hand. Even if you don’t, you can create one with items already in your garage.
The biggest takeaway from this guide is consulting your owner’s manual for detailed instructions and following those steps to the T. More importantly, it pays to have a complete tool kit that includes a tire deflator and pressure tool set with you at all times, as you never know when you’ll need it.
Kris is an avid off-roader and outdoor enthusiast who loves to brave the elements and take on challenging terrain. He also enjoys sharing his passion and knowledge with others so that they, too, can appreciate the ride.
About Kris