Evacuating a car’s AC system is an important skill. It ensures the air conditioning is in tip-top shape for those long weekend drives. However, some drivers veer away from doing this themselves, fearing that they’re not adept enough. This guide aims to counter this notion by providing more information on the maintenance procedure and proving how easy it is. So, how do you evacuate your car’s AC system?
Knowing how to evacuate an AC system is crucial to the upkeep of your vehicle. It entails using proper equipment like a vacuum pump, AC recovery unit, and manifold gauges and requires stringent adherence to OEM-recommended steps. It takes 30 minutes to an hour to complete the entire process.
Here are the 10 steps on how to evacuate the AC system of a car:
- Get the proper equipment
- Prepare the recovery tank
- Hook up the vacuum pump
- Empty the recovery tank
- Bring out the manifold gauges
- Connect the hoses to the recovery unit
- Rid the AC system of air and moisture
- Disconnect the manifold gauge connectors
- Close all other open valves
- Replace service port covers
There are many downsides to not evacuating and discharging your vehicle’s AC. This includes restricted refrigerant flow and severe damage to AC components. At best, you would find yourself profusely sweating when driving for long hours.
Continue reading to learn how to evacuate your car’s AC.
How to Evacuate Car AC System (10 Steps)

Since evacuating or discharging your AC system is part of routine maintenance, adhering to the timeliness of this process is crucial. You have two ways to go about it – either employ the services of a professional mechanic or learn how to evacuate the AC system yourself.
Luckily, for DIYers, the steps one needs to cover are relatively easy to perform, as follows:
1. Get the Proper Equipment
Wear protective glasses and gloves before working on your vehicle’s air conditioning or AC system. Also, make sure you have the following tools ready, as follows:
- Manifold Gauges (view on Amazon) – central connection point in your vehicle’s system
- Vacuum Pump – removes all the air from the recovery tank.
- AC Recovery Unit/Machine – moves all the refrigerant to the recovery tank.
- Recovery Tank like MASTERCOOL 63010 Refrigerant Recovery Tank (view on Amazon)
2. Prepare the Recovery Tank
Prepare the recovery tank by opening the valves and releasing the nitrogen in the tank.
3. Hook Up the Vacuum Pump
Remove air and moisture from inside the recovery tank by attaching a vacuum pump to its blue-colored valve. AutoZone or other similar auto shops may offer rentals. Make sure that your recovery tank valves are closed as you do this.
Then, turn on the vacuum pump while simultaneously opening the blue-colored valve. Leave the vacuum pump on for approximately an hour to remove all air and moisture from the recovery tank.
4. Empty the Recovery Tank
Close the recovery tank valve and the vacuum pump. Make sure you do these first few steps in this exact order. Otherwise, you may suck the oil from the vacuum pump into the recovery tank once the vacuum has been created.
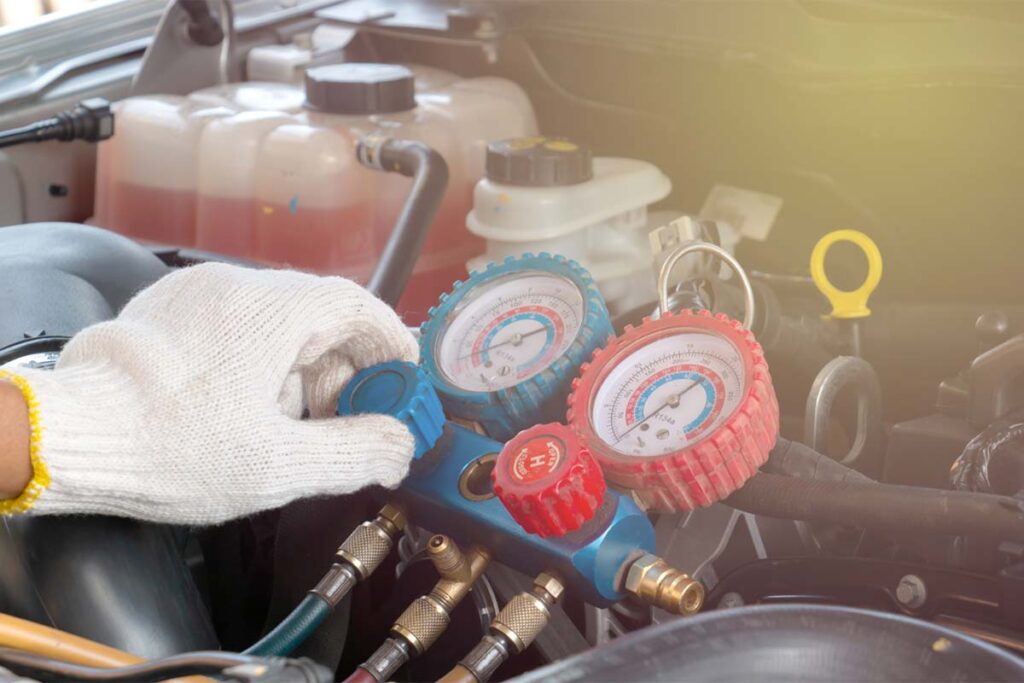
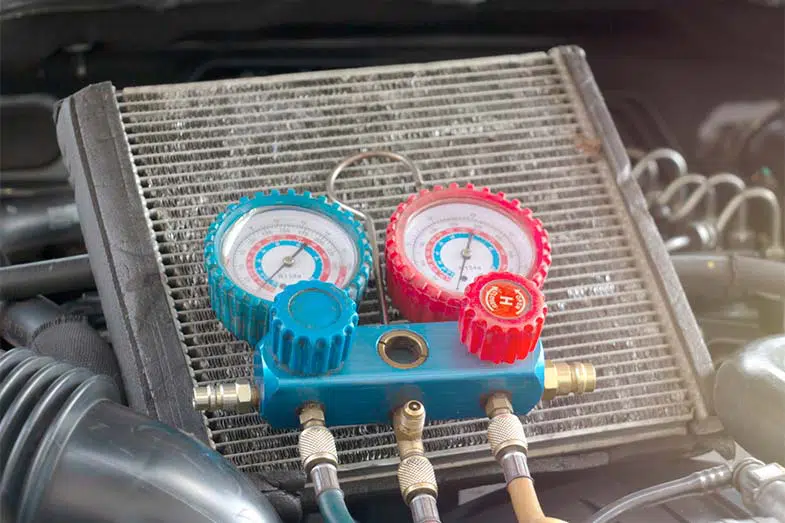
5. Bring Out the Manifold Gauges
Hook up the manifold gauges. Ensure they are closed before connecting them to your vehicle. Take note of the high and low-pressure sides under the hood of your car as you do this.
The high-pressure port is between the condenser and the expansion valve/orifice tube. The low-pressure port is on the return line between the compressor (view on Amazon) and the evaporator/firewall.
Connect the high-pressure side with the red manifold connector and the low-pressure side with the blue manifold connector. Don’t worry about size compatibility, as the end fittings of these connectors differ from each other (not to mention that they’re color-coded).
6. Connect the Hoses to the Recovery Unit
Connect the yellow manifold connector to the corresponding port on the AC recovery unit or machine that says “in.” Then, get another yellow connector and hook up one end to the recovery unit port that says “out,” with the other end connecting to the blue-colored valve of the recovery tank.
7. Rid the AC System of Air and Moisture
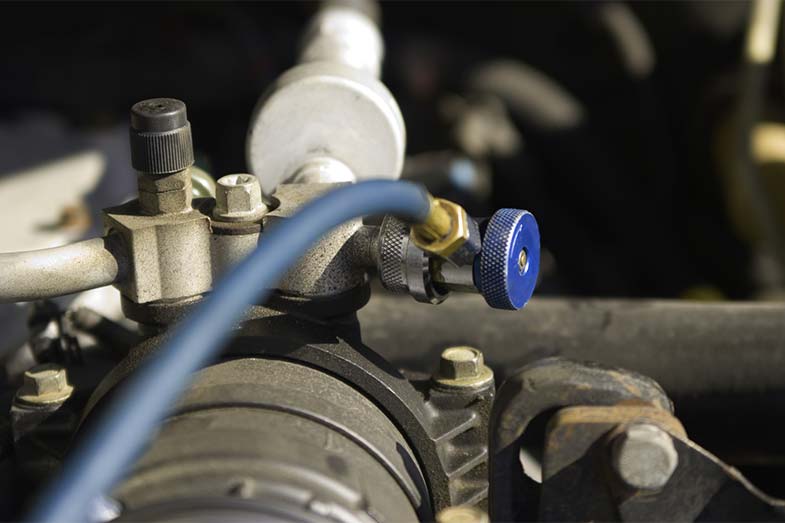
Slowly start opening the blue-colored valve on the recovery tank and keep an eye out for leaks. Then, open the blue liquid valve on the manifold gauges to remove liquid from the AC system. Once done, open the red vapor valve on the manifold gauges. This latter step should finish evacuating the car’s system.
Let the evacuation process run for about 30-45 minutes or until the manifold gauges read zero. A readout below zero is better since it means that the system can hold a vacuum (proof there are no leaks in the AC system).
Tip: Leave the manifold gauges hooked up to the vehicle for at least 30 minutes to an hour after closing the pressure lines and vacuum pump. If the readout stays as is, then you’re guaranteed a leak-free AC system.
Most vacuum pumps will only achieve 20-25″ Hg instead of the ideal full vacuum of 29.6″ Hg. So depending on the type of vacuum pump used in evacuating the AC system, vacuuming times may take longer than what’s mentioned in this guide to achieve desired results (sometimes, even longer than an hour in high-humidity conditions).
It’ll be wise to research a bit on the vacuum pump that’ll provide the best values, especially if you’re buying one. But if you’re only renting the equipment, it’d be okay to rely on where the needle points to in the manifold gauges.
Note: At anytime time the vacuum reading goes up more than 2″ Hg on the gauge after discharge and vacuum has been completed, make sure to immediately check for leaks in the connectors and AC components, and repair as needed.
8. Disconnect the Manifold Gauge Connectors
As soon as the manifold gauges read zero, close the red vapor and blue liquid valves. However, close the inlet valve/port on the recovery unit first before the outlet valve/port. Then, turn off the recovery unit completely.

9. Close All Other Open Valves
Close the recovery tank’s blue-colored valve before disconnecting the lines/connectors. Remove the lines/connectors in the same order they were hooked up. Begin disconnecting the lines in the car, followed by those attached to the recovery unit and (lastly) the yellow line connected from the AC recovery unit to the recovery tank.
10. Replace Service Port Covers
Finally, replace the black dust caps originally covering the low and high-pressure lines underneath the hood of your vehicle.
Contrary to popular belief, evacuating or purging your car’s AC system is not as difficult as it sounds and can be performed even by new-vehicle owners (though it does require some skill and mechanical savvy). If anything, the most challenging part of the entire process is having all the tools ready beforehand and being thorough but cautious throughout the whole process. Even this has a solution, should equipment ever be a problem.
However, be warned. Evacuating your car’s AC system – meaning ridding it of air and moisture buildup – is entirely different from pulling refrigerant out of your AC system. If you need to do the latter, it would be best to bring your vehicle to an auto shop and outsource the task to a professional.
Jiffy Lube, for instance, inspects AC components such as the compressor drive belt, serpentine belt, and the like for leaks, cracks, or damages – in addition to pulling refrigerant out of your vehicle’s AC system.
When to Evacuate the AC System (A Non-Exhaustive List)
- After changing your AC compressor
- Before replacing the refrigerant
- After repairing or replacing any component of your AC system
- Air vents are blowing warm/hot air
- After discovering and fixing an AC/refrigerant leak
- When the AC system consumes too much power (car battery drains faster than normal when AC is on) or becomes contaminated
- Noticeable icing at low-temperature points
- When any of the AC components are exposed to air (especially for extended periods)
How to Recharge an AC System
When recharging or putting fresh refrigerant into your AC system, you’ll need the same set of tools used for evacuating or purging it. The yellow hose/connector from the manifold gauge connects to a new refrigerant keg instead of the recovery tank.
1. Open the Refrigerant Valve
Once the fittings to and from the refrigerant container are airtight, carefully open the refrigerant valve (with the manifold gauge valves still closed). The manifold gauges should display equal readouts – a result of static pressure based on ambient temperature – on both high and low-pressure sides once you do this.
2. Check OEM-Recommended Amount
The specific amount of refrigerant your vehicle’s AC system needs to operate correctly depends on its make and model. Check your owner’s manual or the system sticker label for the OEM-recommended amount.
Suppose the refrigerant is contained in a keg. If so, use a digital bathroom scale to measure how much has already been put in the AC system. Refrigerants in cans wouldn’t require weighing anymore since that information is already on the can itself – you just have to add.
3. Let the Refrigerant In
When charging your AC system, start the engine and turn the AC to its highest coldness and fan speed settings. Once done, partially open the blue, low-pressure side to let the refrigerant in. Never open the high-pressure side, as it’s only meant for monitoring. The compressor should turn on once the refrigerant enters the AC system. Readings on the low-pressure side of the manifold gauge would also simultaneously rise and fall.
Conversely, you may notice the high-pressure gauge reading steadily rising. When this happens, have a buddy slightly raise the engine idle slightly and use a garden hose to spray water over the condenser to cool it down (if needed).
Let the refrigerant flow into the system and keep doing this until you’ve achieved the recommended amount of refrigerant for your car’s system.
You will know your car’s AC system is fully charged when your manifold gauge readings look a certain way (refer to owner’s manual for specifics) and the AC compressor stops its on-and-off cycle. Otherwise, the system may be overcharged, there’s a blockage in the expansion valve, or you have a busted cooling fan.
4. Turn Ignition Switch Off
Turn the ignition switch off once the system is fully charged. If all goes well, the passenger air vents and evaporator should feel cold to the touch and give off the right coldness inside the cabin. Close the internal valve and service ports of both high and low-pressure side valves.
You should hear a slight hiss or pressure release sound when you pull up the valve retainer ring/coupler from the service ports. Don’t forget to replace the black dust caps on both ports.
Evacuate Car AC System Cost
If you have manifold gauges, a vacuum pump, an AC recovery unit/machine, and a recovery tank, evacuating your AC system will basically be free. But if you’re to ask a professional to take over, you may incur the following charges (depending on if it’s a mere evacuation or an evacuate-recharge procedure):
| Task | Cost |
|---|---|
| Evacuate and Recharge | $119 to $280, depending on vehicle make and model (plus accompanying problems) |
| Refrigerant Refill | $100 to $350, depending on the size of the HVAC unit |
| Refrigerant Removal | $100 to $300, depending on equipment, labor, and disposal methods |
How to Evacuate Car AC System Without a Pump
Using the equipment mentioned earlier is the best way to go about evacuating your vehicle’s AC system. But should you find yourself in a dilemma – for instance, figuring out how to evacuate your car AC system at home – then these workarounds would be worthy substitutes:
1. Create a Makeshift Pump
First, you have to find an old refrigerator with a good compressor. Next, remove the compressor and look for its two hoses. Put the proper fitting on the suction side (the larger of the two) and leave the discharge side (the smaller of the two) open.
Voila! You now have a free self-made vacuum pump. If renting one isn’t an option, this substitute should give you enough time to procure an actual vacuum pump.
2. Install an Access Valve
Another way you can evacuate your vehicle’s AC is by installing an access valve on both the low and high-pressure ends of the system. Once set up, depress the access valve on the high-pressure side while letting pressure on the low-side drop to near-zilch or the lowest point possible.
Charge the low-pressure side to 14 psi. Wait for pressure readings on both sides to equalize. Monitor this for approximately three minutes at a time, then repeat depressing the high-pressure end, charging the low-pressure side, and allowing the pressure readings to align. You’ll know you’re doing the procedure right if the low-pressure reading doesn’t drop as low as it initially did.
Word to the Wise: You may stumble across some vehicle owners in forums advising to evacuate the AC system by opening up the high-pressure lines, starting the motor, and allowing the vehicle’s own compressor to vacuum down the system. While this idea may sound tempting, it wouldn’t work at all (or at least, not as efficiently as a proper setup would).
Closed System
Remember that your car’s AC system is a closed system. Leaving its high-pressure side open will only leave a significant amount of air in it, defeating the purpose of needing to discharge the system, to begin with. This method makes it impossible to fill the AC system with a full refrigerant charge.
Additionally, the remaining air and moisture end up contaminating the dryer. As a result, temperature and pressure differential become significantly reduced and cooling efficiency less than acceptable.
Conclusion – How to Evacuate Car AC System
To recap, below are the 10 steps on how to evacuate a car’s AC system:
- Get the proper equipment
- Prepare the recovery tank
- Hook up the vacuum pump
- Empty the recovery tank
- Bring out the manifold gauges
- Connect the hoses to the recovery unit
- Rid the AC system of air and moisture
- Disconnect the manifold gauge connectors
- Close all other open valves
- Replace service port covers
You should now have a renewed understanding of how to evacuate and recharge the AC system of your vehicle. While most of the information here may be common knowledge, most of this article best serves the new car owner, those performing an AC evacuation and recharge for the first time, and folks who are brushing up on their vehicle maintenance. Whichever the case, everyone is sure to benefit from keeping their AC systems contaminant-free and in check.
Kris is an avid off-roader and outdoor enthusiast who loves to brave the elements and take on challenging terrain. He also enjoys sharing his passion and knowledge with others so that they, too, can appreciate the ride.
About Kris