In an age where reducing one’s carbon footprint is a top priority, keeping your car’s Evaporative Emission Control (or EVAP) System working is of the essence. To do this, you need to detect early signs of leakage — which entails knowing how to test the EVAP canister when required.
There are several ways to test an EVAP canister — checking for continuity and mechanical click, performing close, bubble, and smoke tests, and obtaining ohm readings. Some tests require a running vehicle, while others can be done with the key out of the ignition.
For a more detailed breakdown, here are eight steps on how to test the EVAP canister in your car:
- Prep the vehicle for testing
- Locate the fuel system
- Locate the EVAP canister
- Ensure fuel levels are sufficient
- Do a Continuity Test
- Obtain Ohm meter readings
- Do an EVAP canister purge valve test
- Conduct a vent valve test
The EVAP canister is essential to your EVAP system, so getting acquainted with the symptoms and required checks for a bad canister is crucial. That said, read on and learn more about how to test EVAP canisters in today’s guide.

How to Test Your EVAP Canister
For minor hiccups in your EVAP system, cleaning your charcoal canister with an air compressor (view on Amazon) may work. But there are instances when doing so would be insufficient. When that happens, it is best to carry out the below steps to test the functionality of your canister and nip the issue in the bud:
1. Prep the Vehicle for Testing
Ensure the car is on a flat, stable surface. And before taking out EVAP system components for testing, ensure the vehicle has been idle for at least half an hour.
2. Locate the Fuel System
The journey of the EVAP system starts in the fuel tank — specifically with the barometric-style sensor that detects changes in air pressure caused by leaks and vent or purge solenoids in the system. You will not see this bit even if you peep through the fuel tank opening. Nonetheless, it is important to know it is there.
Locating this component is vital — and one of the reasons is that the vent solenoids in the fuel tank connect to some EVAP canisters. If you own a vehicle where this scenario applies and can follow this line, it would be easier for you to locate the canister.
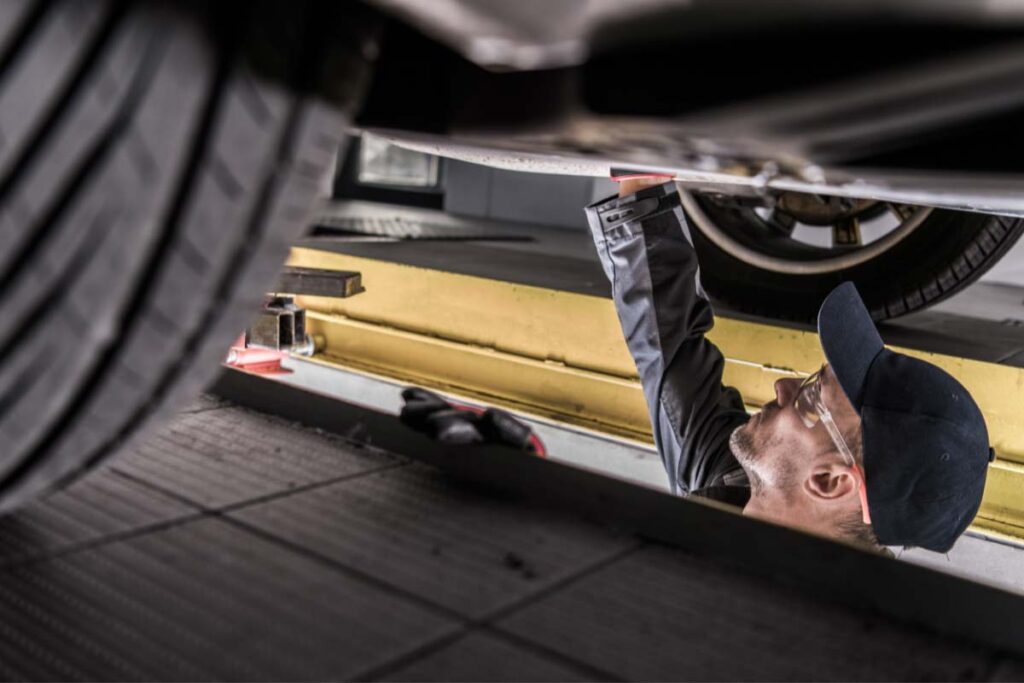
3. Locate the EVAP Canister
In most cases, the EVAP canister is usually located underneath the vehicle (close to the fuel tank), covered in either a box or spherical plastic container, and connected to vapor hoses and an electric harness. If not, you can find it near the rear tire on the vehicle’s driver’s side or positioned behind the silencer or muffler. For some European models, manufacturers fit the canister closer to the engine.
Either way, spotting the EVAP canister can prove tricky because it is covered with several plastic components. To make locating the canister less troublesome, refer to a repair manual or database specific to your car.
4. Ensure Fuel Levels Are Sufficient
The tank fuel level is critical when testing the integrity of the EVAP system. If the fuel tank is either empty or full, the vehicle’s self-diagnosing mechanism will not be able to test properly since the required air volume in the tank is not met.
Insufficient fuel levels also make resetting the EVAP monitors difficult, not to mention that it masks potential issues with the fuel level sensor.
5. Do a Continuity Test
To perform this test, you need a multimeter (view on Amazon) and measurement probes. You also need to disconnect the purge valve from the engine.
Once you have the purge valve, set your multimeter to continuity mode and connect the two probes to the purge valve terminals. If the purge solenoid works, your multimeter should produce an audible noise when you touch the latter together.
6. Obtain Ohm Meter Readings
Using the same multimeter, turn its dial to the Ohm-meter measurement and connect the two probes to the purge valve terminals. With this test, you would want to get an Ohm reading between 14 to 30 Ohms, as these figures indicate a healthy purge valve.
You may refer to your service manual for OEM-recommended values. Either way, replace your purge valve immediately if you get a reading falling below this range.
7. Do an EVAP Canister Purge Valve Test
The procedures for how to test an EVAP canister purge valve are specified in your service manual. However, how it operates depends on the make and model of your vehicle. For most cars, the purge valve is normally closed when there is no voltage (and vice-versa when voltage is applied).
First, test for an audible mechanical click by applying voltage to the purge valve terminals. You may use a 9V battery voltage, but 12V is better.
Next, test for leaks. Also, see if the purge valve closes properly. You may use a handheld vacuum pump. Attach it to the EVAP canister and fasten a 5/8″ hose to the other end that goes into the intake manifold. Then, see if the purge valve closes once you apply vacuum to it (a vacuum of 20 to 30 in-Hg/mm-Hg is suggested).
A purge solenoid that seals properly should be able to hold the applied vacuum for at least a minute. In like manner, it should open, and the vacuum should immediately drop once you apply battery voltage.
Your purge valve is defective if it does not do either. But if both tests check out, you may need to test your EVAP canister’s vent valve.
8. Conduct a Vent Valve Test
The function of a vent valve (a.k.a. Canister Close Valve or CCV) is inversely proportional to that of a purge solenoid. While the latter’s normal state is closed, a vent valve is usually open.
It closes when the PCM/ECM runs a leak test on the EVAP system. Hence, the way you would test a vent valve is similar to a purge solenoid’s — except that you will need to test for inverted outcomes.
Applying voltage on the vent valve (preferably 12V) should keep it closed. Whereas no voltage should leave it open.
In like manner, it should not be able to hold any vacuum in its normal state but be able to do the opposite when voltage is applied. If the vent valve passes the vacuum test with flying colors, you will then need to test the power at the vent valve electric connector.
In conducting these tests, it is crucial to understand the layout and location of the vent valve. The CCV may either be attached to the EVAP canister or installed separately but near it. But it usually has two sides — one that connects to the EVAP canister and another that attaches to the car’s frame.
Because of how it operates and where it is situated, it tends to stick open or fail and be prone to corrosion. And when a vent valve is severely rusted, testing it for power and ground may no longer be warranted. Instead, the said condition may call for an immediate part replacement.
Tools for Testing:
- Diagnostic scan tool
- Socket set
- Torch
- Multimeter and measurement probes
- Battery charger
- 5/8″ rubber hose with clamps
- Fuel system cleaner (optional)
- Impact wheel gun like Ingersoll Rand W7152-K22 20V 1/2″ Drive Cordless Impact Wrench (view on Amazon)
- Starter tool kit
- Car Jack
- Oil leak stop
Symptoms of a Bad Charcoal Canister
Aside from excessive refueling (or “topping off” your gas tank), overheating, lack of maintenance, and time can cause your vehicle’s EVAP canister to fail.
This section will review some telltale signs that hint at when this is the case. (Pay mind to synchronous symptoms — getting one by itself may not necessarily mean a failing EVAP canister, but getting two or more indicators together definitely would.):
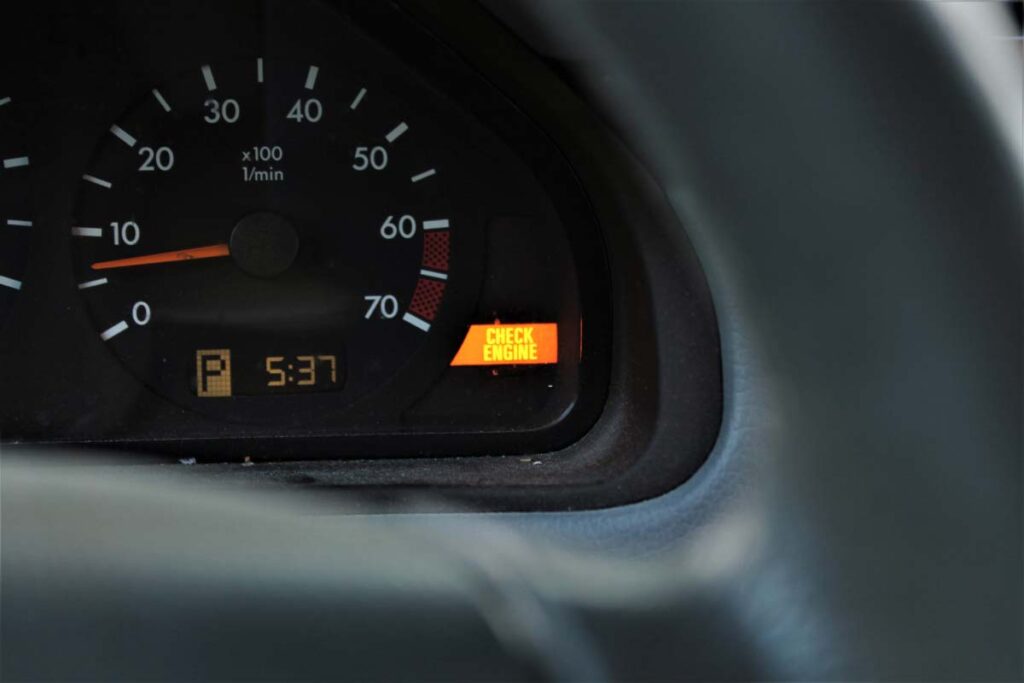
Illuminated Check Engine Light
A flashing or illuminated Check Engine Light is one of the more obvious signs of a charcoal canister gone bad. Although not exclusive to a failing EVAP canister, this warning light is often associated with a stuck EVAP purge valve or one that has not fully closed when it does come off.
The seamless function of an EVAP system is only possible with an average pressure of 40-60 psi (or more for cars with direct fuel injection). If the system has a leak or obstruction, the EVAP canister will not be able to hold the needed pressure for the engine to work. Consequently, the ECU will pick up on this discrepancy and trigger the CEL.
If you suspect this scenario, a high-spec diagnostic tool like Autel Scanner MaxiDAS DS808K OBD2 Scan Tool (view on Amazon) should help confirm your suspicion.
Topping up Problems
Whenever you refuel your vehicle, gases and air exit as fresh fuel goes into the tank. But if you have a clogged charcoal canister or vent line, fuel fumes that are supposed to go out will struggle to pass and create high pressure in the tank. The consequent pressure will cause your car’s fuel hose nozzle to shut off and fuel to pour out in other places except the tank.
Strong Fuel Odor
Unlike weird noises coming from the engine and fuel tank, the stench of fuel in your car indicates a more serious problem — significant damage to the body of your EVAP or charcoal canister. It would be difficult not to take notice when this happens, as the smell will permeate inside your cabin whether the vehicle is running or the engine is off.
Tend to this issue immediately at the first instance of the acrid smell. While delayed repairs or replacement could translate into more expenses, the bigger concern is that inhaling fuel odor is dangerous for your overall health.
Reduced Vehicle Performance
Poor performance is often traced back to problems with the purge valve since this component connects the EVAP system directly to the engine. Stuck or obstructed purge valves result in an imbalanced air-fuel mixture, ultimately decreasing vehicle performance.
Accompanying symptoms include one or all of the following — reduced gas mileage (more on this item later), starting issues, and rough idling. Starting issues result from a vacuum leak caused by a problematic or damaged EVAP canister. Meanwhile, rough idling and retarded speeds are due to a vacuum leak or an unstable RPM count.
Poor Gas Mileage
The function of the EVAP system serves two important purposes — one is to reduce toxic fumes released into the environment, and the other is to extend the number of miles you can get out of a full tank. These processes are intertwined and coined by long-time car owners as “recycling of fuel vapors.”
The fumes that the EVAP system moves to the combustion chamber to burn include fuel vapors. But if these vapors escape into the air instead of getting burned up in the combustion chamber, you end up with less fuel in the tank.
Fuel loss leads to reduced gas mileage and a need to refuel more frequently. Doing the latter will not only hurt your wallet but also cause your EVAP canister to get clogged or saturated.
Damaged Gasket
More of an outcome than a symptom, a blown gasket is one of the many things vehicle owners discover when they have left their EVAP canister issues unattended for too long.
This telltale sign is not exclusive to a problematic canister and typically preceded by coolant-related issues, engine oil discoloration, overheating, and thick white smoke from the exhaust. Nonetheless, compounded overpressure in the fuel tank — caused by a vacuum leak or defective charcoal canister — could result in this.
Failed Emissions Test
During emissions testing, a car’s emission levels are checked to ensure that toxic fumes exiting its tailpipe do not exceed set regulations. You need not worry if your EVAP canister is in tip-top shape. But if not, misfuel could cause you to fail emissions testing.
Blanking off the charcoal canister’s vent pipe enables car owners to see if it affects emissions and rule out a faulty canister. From there, they decide whether or not to replace the latter.
Pinging or Hissing Noises
Another symptom of high pressure in the fuel tank is pinging or hissing sounds. Hearing hissing noises when opening the tank cap to refuel is quite alright, if only for a short time, and should go away as you fill up the tank. But if it occurs more frequently than usual, you might have a problem with your EVAP system or the EVAP canister itself.
Pinging sounds, on the other hand, could be caused by either overpressure or under pressure in the gas tank. Similar to hissing, they do not necessarily signify an EVAP canister on their own. However, the reverse is true if the pinging you hear occurs alongside any of the other indicators detailed in this article.
Excessive Exhaust Smoke
While misfuelling and excessive exhaust smoke is more popularly caused by using the wrong fuel variant, they can also be due to an EVAP canister not functioning as designed. For the latter, a defective or split charcoal canister would best explain it. Yes, the occurrence is quite rare — but not impossible.
To test if you suspected correctly, blank the vent pipe from the EVAP canister. Positive changes to your vehicle’s excessive exhaust smoke would confirm that something is wrong with your canister.
How Much Is an EVAP Canister Repair Cost?
Repair of or replacement for an EVAP canister costs between $130 and $750 (inclusive of parts & labor) on average. Ultimately, your repair costs would depend on several factors — the location and cause of the EVAP leakage, the age and mileage of your car, and the sophistication of your EVAP system.
While some triggers only require minor repairs, others may warrant the replacement of major system components. Although highly unlikely, some issues may demand changing your EVAP canister to a new one.
Can You Bypass an EVAP Canister?
Bypassing your charcoal canister is ill-advised and not just because of increased emissions. Despite this, many vehicle owners have done it and claim to have no problems or lingering smells inside their cabin afterward.
Online forums reveal that uncomplicated changes to the EVAP system will still allow all components to be put back in place come time to pass vehicle inspection.
Conclusion – How to Test an EVAP Canister
To review, here are the steps on how to test your vehicle’s EVAP canister:
- Prep the vehicle for testing
- Locate the fuel system
- Locate the EVAP canister
- Ensure fuel levels are sufficient
- Do a Continuity Test
- Obtain Ohm meter readings
- Do an EVAP canister purge valve test
- Conduct a vent valve test
Testing your charcoal canister may be daunting at first. But it is a welcome experience, especially for new vehicle owners. It is a crucial skill to have and something that tremendously helps with the proper upkeep and diagnosis of potential car problems.
Note that the recommendations you see in forums on “deleting” the EVAP canister are not a cookie-cutter method and, therefore, not guaranteed to work on all makes and models. Moreover, the process could put you and your vehicle in trouble — whether or not done correctly.
Evading repair costs may seem tempting at first. However, remember that bypassing the canister will only provide temporary relief from your vehicle problems and may cost you more money and inconvenience down the road.
Kris is an avid off-roader and outdoor enthusiast who loves to brave the elements and take on challenging terrain. He also enjoys sharing his passion and knowledge with others so that they, too, can appreciate the ride.
About Kris