Although not as nerve-racking as a triggered CEL, a Check Gauge light can be as tedious to diagnose and fix – especially if it occurs intermittently. Getting this alert to disappear from your instrument panel ranges from tightening your gas cap to having your pockets run dry on an engine rebuild.
That said, let this article give you more insight into what sets off this warning light and how to effectively resolve it.
The ‘Check Gauges’ light on your dash means at least one of your vehicle’s gauge readings is out of range. Typically, the affected gauge illuminates along with this warning. Fixing the problem involves simple to complex solutions – depending on how well you’ve taken care of your vehicle.
Contrary to popular belief, resetting the Check Gauge light doesn’t just entail refueling or refilling your oil or coolant levels. In like manner, it isn’t always as daunting as rebuilding your vehicle’s engine or accessing the radiator.
So before you jump into performing a conclusive fix, read this guide – I’m confident you’ll pick up some helpful information.


Check Gauges Light and Its Meaning
The Check Gauge Light is a warning set off by the PCM or Powertrain Control Module to tell the driver of a potential problem. Specifically, it indicates one of two things – either the car’s gauges have a reading that deviates from normal operating parameters, or oil pressure/coolant temperatures are approaching hazardous levels.
When illuminated, the ‘Check Gauges’ light has either a yellow/amber, orange, or red hue flashing on the instrument cluster (typically next to the fuel gauge).
Due to the numerous gauges present in a vehicle, this tell-tale/idiot light can mean anything from low oil pressure or charging system anomalies to a fuel tank issue.
In Jeep Grand Cherokee, Cherokee, and Wrangler models, for instance, one of the below gauges in a low-/high-line cluster could have an out-of-range reading:
- Coolant temperature gauge
- Fuel gauge
- Oil pressure gauge
- Speedometer/odometer
- Tachometer
- Trip odometer
- Voltmeter
While the color of the ‘Check Gauges’ light signifies a suspected problem’s urgency, savvy car owners advise immediately checking the dash to see which of the gauges is amiss.
As a driver, you’d want to inspect the gauges for water level, brake fluid level, engine oil level, and tire pressure first, as they are likely to result in an on-road emergency if not caught early on.
In most vehicles like the Ford F150, a decently visible “Check Gauges” light illuminate in the event of a peculiar gauge reading. But for Jeeps, this indicator is minute and quite negligible.
Hence, it is a must for owners to be familiar with the type of instrument panel their Jeep has (whether analog or digital), as well as its circuit schematic. The latter is vital in the proper diagnosis of a triggered Check Gauge light – the resolution of which often includes servicing or repairing the 4×4’s relay center or fuse block module.
Check Gauge Light Triggers and How to Fix Them
Understanding what sets off the ‘Check Gauges’ light is crucial to resolving it. Thankfully, your car’s PCM/ECM/ECU has tons of Diagnostic Trouble Codes saved in its repository that tremendously help in this situation.
Here are common reasons behind an illuminated ‘Check Gauges’ light and their corresponding fixes:
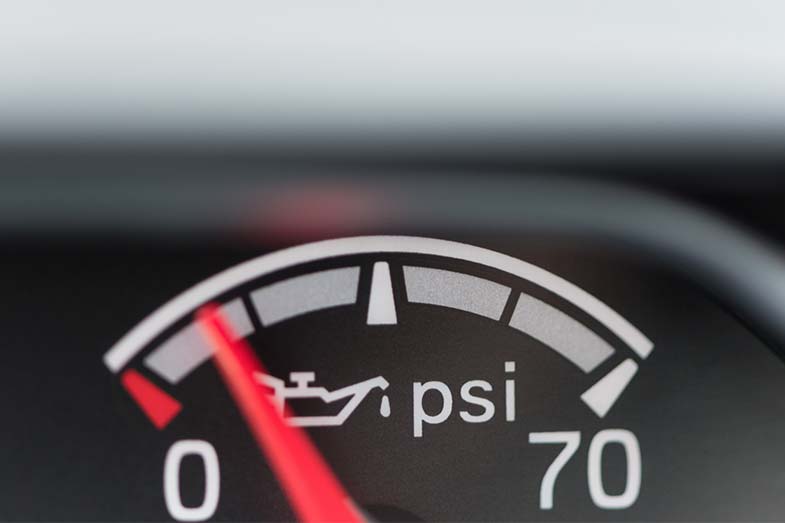
Low Oil Pressure
In cars where the PCM controls all gauges and monitors the sending units, oil pressure that is slow to come up to spec would cause the ‘Check Gauges’ light to show up when starting but not during restarts. When this occurs, the oil light illuminates along with the ‘Check Gauges’ light (though not for all types of vehicles).
One of the most common reasons is this – an oil filter may be leaking oil back into the engine, taking the oil pump a while to refill what’s missing when you start the car. You may also have a bad oil pressure sensor.
The oil inside your vehicle turning cold due to ambient temperature is also a factor. The light indicators reset the second time around since systems are primed when you restart, causing the oil pressure to come up quickly.
Overheated Engine
Your temperature gauge lets you know if your engine is overheating or it’s too hot to operate. So when vehicle temperature reaches outlier levels, this gauge goes mad and triggers the Check Gauge light.
An engine usually overheats if something is wrong with the radiator (usually a crack in the seam) or if something impairs the coolant from circulating throughout the engine. Symptoms include a burning coolant smell and reduced power delivery.
You may also notice the coolant level depleting faster than normal.
It is key to understand that because the engine produces a lot of heat and vibration, your car’s cooling system and its components can easily fail or leak coolant (the reason a blown head gasket is so common). You may end up with a damaged cylinder head or engine block and seized pistons.
That said, you’ll have to literally and figuratively approach an overheated engine problem with extra caution. Plus, you need to replace defective components right away.
Faulty Sensors/Sending Units
Fully functional sensors or sending units are necessary for your car’s electrical gauges to show accurate readings. A defective O2 sensor, for instance, would do the reverse.
It would activate the ‘Check Gauges’ light and cause a slew of other things – reduced fuel economy, damaged catalytic converter, fouled spark plugs, and emissions test failure (to name a few). Likewise, a faulty oil sending unit would cause an out-of-range reading.
Identifying the faulty sensor or sending the unit and replacing it immediately would help set your electrical gauges right.
Loose Gas Cap
Similar to CEL, this can also trigger a ‘Check Gauges’ light. An ill-fitted gas cap disrupts the fuel delivery system and fails to keep it under the correct pressure – thus resulting in fuel loss.
Simply tightening the cap or replacing the O-ring or gas cap itself usually turns the light off. Otherwise, you may need to refill at the nearest servo or pump station.
Thermostat Issues
When defective or with a leak, the thermostat fails to aptly regulate coolant flow to the engine. Furthermore, it contributes to a contaminated/corrosive coolant that, in turn, causes an engine to overheat.
Adding coolant to the reservoir usually resolves thermostat issues, barring damage to the thermostat and ECT (Engine Coolant Temperature) sensor.
Bad Water Pump
A bad water pump can freeze your belt and set off the ‘Check Gauges’ light (not to mention make your gauges go erratic).
For most cars, you access the water pump by removing the upper radiator hose, disconnecting the fan clutch’s electrical connector (where it attaches to the harness on top of the shroud), and getting the fan, clutch, and shroud out altogether. You will have to wrestle it a bit without damaging the neck/shroud or puncturing the radiator.
Vacuum Leak
The vacuum system is essential to the smooth operation of your vehicle, as it performs a wide variety of functions. When this system is upset (due to cracked fittings or a leak, for instance), your car would start to surge at unusually high RPMs, trigger the Check Gauge light and a bunch of codes, or cause other phantom problems.
Some vehicles already have a vacuum or pressure gauge (a.k.a. manifold gauge). If your car doesn’t have one yet, you can opt for an aftermarket vacuum gauge to keep the health of your engine in check.
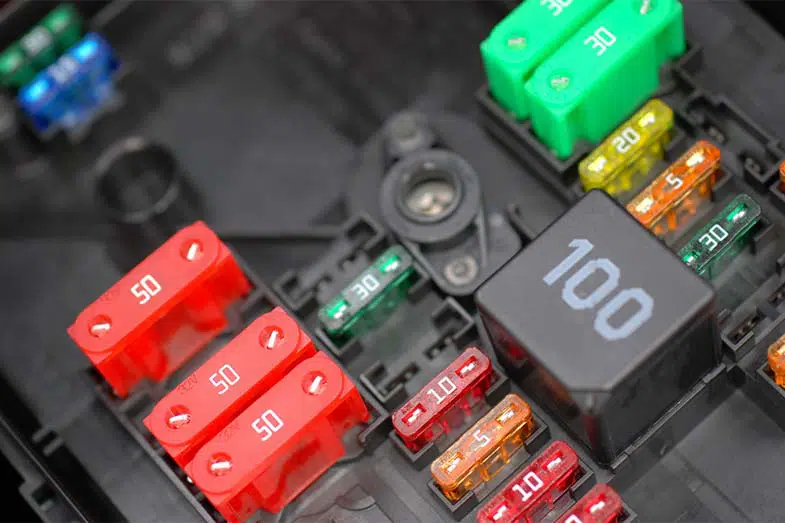
Blown Fuse
Depending on how many blown fuses your vehicle has, it could affect one or more gauges and cause the ‘Check Gauges’ light to come on. Luckily, this is one of the triggers that are easier to access and fix.
Just make sure no power is supplied to the fuse box and the ignition before working on it. And the moment you see filaments, blackening, or broken metal strips, swap out the blown fuse immediately with a same-amperage replacement.

Charging System Issue
Sometimes, lifting your foot off the accelerator and pressing on the brakes causes the car’s voltage to lower and one or more of your gauges to go berserk. While some may be comfortable with it, you shouldn’t.
Check the health of your battery and wiring, ensuring you do not have shorted wiring or dirty battery terminals. Additionally, use a voltmeter to see if the output of your alternator is up to spec and not causing a battery drain.
Loose Fan/Accessory Belt
For older Jeep Wranglers that ford through deep water or is driven in cold/wet weather (sometimes for too long), the Check Gauge light is likely to come on and may even be accompanied by a squealing sound from under the hood. A wet or slipping belt would cause your vehicle’s alternator to stop charging.
In some cases, the light goes away once the weather warms up or the belt dries off. But to side with caution, make sure to check your accessory drive belt for wear and slippage regularly.
Mechanism Malfunction
An intermittent Check Gauge light can be a sign of mechanism malfunction (though not all the time). Customarily, the idiot light illuminates with an error code (or vice-versa). But in this situation, it doesn’t.
This glitch could be due to the PCM having a poor electrical connection or some other sort of wiring problem. Other probable causes are sticky valves and engine failures.
Either way, it is wise to visually inspect all relevant electrical components for looseness or damage. Better yet, duplicate the issue to verify if it’s indeed a malfunction.
Defective PCM/ECM/ECU
In modern vehicles, the onboard (or OBD) computer is responsible for measuring digital gauge parameters. And although it is essentially the vehicle’s brain, it can be flawed at times and cause a ‘false warning’ – meaning that there isn’t really anything wrong with your vehicle’s sensors and electrical or mechanical components.
If you get a false warning and everything else checks out, check the condition of your PCM/ECM.
Non-adherence to Periodic Maintenance
Yes, you read that right! Purposely skipping on required maintenance like oil changes and the like can set off the idiot light and wreak long-term havoc on your vehicle. A clogged catalytic converter is just one of the many repercussions of stubbornness.
The above (non-exhaustive) list, alongside low fuel levels, ‘Check Bulbs’ warning, and a bad key cylinder, ignition switch, or instrument cluster, usually set off the ‘Check Gauges’ light.
Whether or not these triggers coincide with the fault codes you get from your OBD-II Scanner (view on Amazon), it is best not to disregard them. If all else fails, seek help from a competent mechanic.
How to Resolve Low Oil Pressure
With low oil pressure taking the cake for being the top trigger for the ‘Check Gauges’ light in Jeeps and other vehicles, it is only fitting to have a dedicated section. Let us talk about oil pressure and factors that put it below normal parameters and how to bring it back to spec.
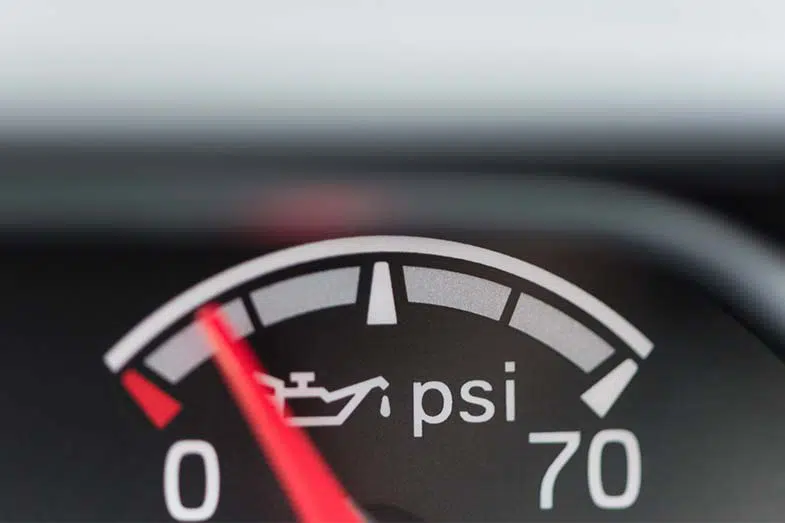
Gauge Behaviors:
- Low oil pressure warning light is on
- Engine oil pressure light flickers incessantly
- Intermittent low oil pressure warning light (indicative of a failing oil pressure sensor)
- The oil pressure gauge is showing reset to zero
4 Causes
1. Insufficient Oil
Several factors could lead to not having enough oil in the engine:
- Excessive oil consumption happens as a result of evaporation.
- A car’s engine is old and expectedly burns more oil than newer ones.
- The vehicle has a leak caused by worn-out piston rings and damaged seals/oil plugs.
2. Incorrect Viscosity
The temperature, kind, and viscosity grade of engine oil influence its ability to overcome resistance and reach lubricated components. Hence, there is worth in OEMs recommending a specific viscosity grade of motor oil – and that is to ensure the optimal performance of your vehicle.
So when you use an oil viscosity that’s either too high or too low, the PCM/ECM may misunderstand it as either inadequate/excessive resistance or a lack of lubrication in the system. These two interpretations ultimately translate to lower-than-normal pressure readings.
3. Clogged Filter
Because of where the pressure gauge installs, your filter becomes extremely important to maintaining oil pressure within range.
The filter installs before the pressure gauge, so the former shouldn’t get clogged. Otherwise, a filter plugged with water/soot contaminants would lead to lubricant starvation.
A faulty bypass valve is a tell-tale sign that you have a clogged filter.
4. Component Wear
Other possible low-pressure causes are worn engine bearings and a worn pump. Bearings are factory-set to a specific flow restriction crucial to maintaining correct oil pressure.
Similarly, a pump generates the necessary pressure for the same cause. Worn-out, engine bearings, and a pump will have reduced flow restriction and produce insufficient pressure, respectively.
They also set off the ‘Check Gauges’ light, in addition to warranting an engine rebuild in worst cases.
Note that the components affecting oil pressure are not limited to these two. Some vehicle owners have ended up replacing the fuel pressure regulator, oil pressure switch connector, oil pressure switch, or camshaft position sensor.
Reducing Risks
Once you know the causes of low oil pressure, prevention becomes easier. Of course, some factors aren’t 100% controllable (for instance, insufficient oil due to evaporation).
But in truth, almost all causes can be prevented by merely adhering to correct oil change intervals, using high-quality, API-and-viscosity-grade-appropriate lubricants, observing unusual changes in exhaust emissions (a necessity for high-mileage vehicles), and performing periodic oil level and engine inspections.
But by the time most vehicle owners get the Check Gauge light on their dashboard, they are way past the near-ideal condition of their car and its engine. Naturally, their car getting low oil pressure readings results from disregarding scheduled maintenance or skimping on the quality of engine oil they use.
When things have reached this extent, check on easier-to-fix components first – like a plugged filter, failed pressure sensor, or a leak. For Jeeps, the top culprit for low-pressure readings is a defective oil pressure sending unit or switch.
Check the wiring harness connected to the sensor to ensure it isn’t loose or burned. If nothing is wrong with the harness, get a mechanical oil pressure gauge (view on Amazon), hook it up to the engine, and test-drive the car.
Showing good oil pressure on the mechanical gauge but not on the dash would mean a failing oil pressure sensor.
Conversely, showing out-of-range or no pressure on the mechanical gauge and the dash would mean a failing oil pump. If found defective, both components would need to be replaced immediately.
How to Reset Check Gauges Light
Complete the Required Mileage/Cycles
For minor root problems, clearing off a triggered Check Gauge light requires passing a few tests from the PCM (or until it has confirmed that the issue is fixed). But for complicated scenarios, you will need to drive for at least 50 miles or complete a minimum of 10 cycles before the alert goes away.
Do the Hard Reset Technique
Otherwise known as the PCM/ECM reset technique, this approach requires turning the ignition off then on thrice. Doing this primes your car’s system on the 2nd and 3rd attempts, making it effective for troubleshooting low oil pressure.
It not only resets an illuminated Check Gauge light but also tests if the alert is intermittent. Its only downside is it’s not guaranteed to clear the ‘Check Gauges’ light for good.
Use a Diagnostic Scan Tool or OBD-II Code Reader
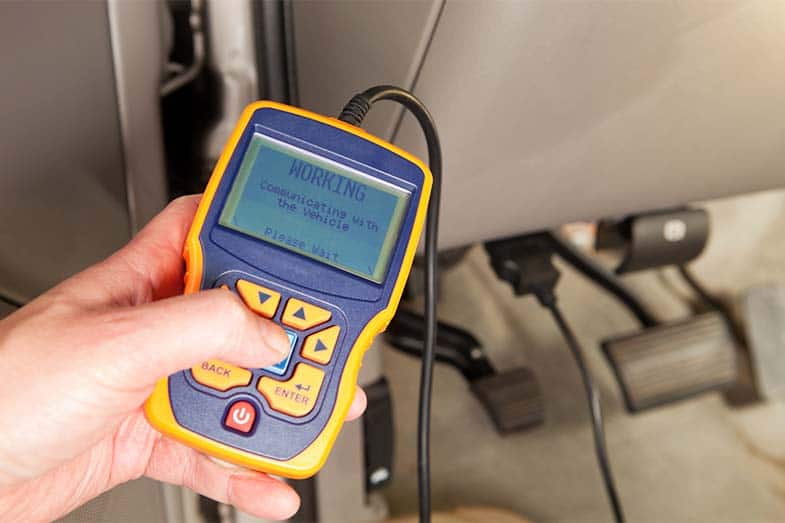
Not all OBD-II code scanners can reset your Check Gauge light, but most recent versions of the tool can. Plug it in the OBD port found beneath your car’s control panel or steering column, and select which fault code to remove.
If your vehicle is a 1997-present model of any make, you should be fine using any scan tool with the described feature. However, pre-1996 automobiles may either not have an OBD port or require a different code reader.
Frequently Asked Questions
Driving With the Check Gauge Light On: Is It Safe and How Long Can You Drive?
It depends on what set the ‘Check Gauges’ light off. If it’s due to low washer fluid levels, then there is no imminent danger in continuing to drive – provided all vehicle systems are still working fine. Otherwise, it is best to pull over and investigate what triggered the alert as soon as possible.
Concerning low tire pressure, 100 miles would be your driving limit (you also need to drive slow enough not to aggravate the state of your tires). But given its adverse effects on drivability, it is best to continue driving only when near a pump/service station. If the latter is too far, better stay where you are and call for help.
How Long Does It Take Before the Check Gauge Light Resets?
The length of time for the ‘Check Gauges’ light to disappear from your instrument panel is comparable to that of the CEL (it will never be instantaneous nor consistent).
Depending on the fault code that came with the alert, its priority in engine management, and the severity of the issue, the time it takes to clear the warning light can fall anywhere from doing a few spins around the block to having your car complete 10 to 20 successful cycles. Luckily, diagnostic scan tools can help reset the ‘Check Gauges’ light much quicker.
Conclusion – Check Gauge Light Meaning (How to Fix & Reset)
When clearing off the Check Gauge light from your dashboard, the first thing you should do is to stay calm.
If the gauge affected is measuring a non-critical facet of your vehicle, then focus on getting to the nearest pump station and go from there. Otherwise, pull over to the nearest roadside or, when safe, assess what’s going on and take out your trusty code scanner or mechanical gauge (if needed).
If unsure, seek assistance from a seasoned mechanic. Lastly, never brave the road with a severely compromised system – lest you run the risk of permanent engine damage or an accident.
Kris is an avid off-roader and outdoor enthusiast who loves to brave the elements and take on challenging terrain. He also enjoys sharing his passion and knowledge with others so that they, too, can appreciate the ride.
About Kris